Environment Setup and Operation Verification on AWS Management Console
This document explains the procedure for directly building an environment on the AWS Management Console without using IaC. If you are not familiar with the Lambda Web Adapter mechanism, we recommend building based on this content first before using IaC such as AWS CloudFormation.
Create Required AWS Resources in Advance
For deployment, first create the following resources.
Create ECR Repository
Create an ECR (Elastic Container Registry) repository to push frontend container images. Log in to the AWS Management Console, enter "ECR" in the search box, and create a new repository from the following screen.
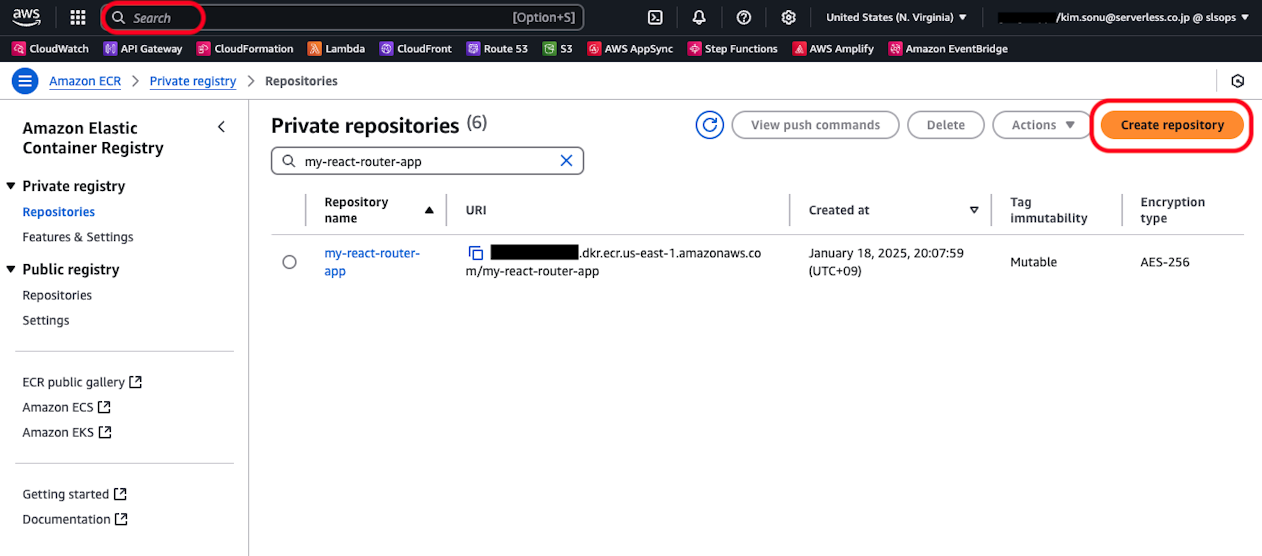
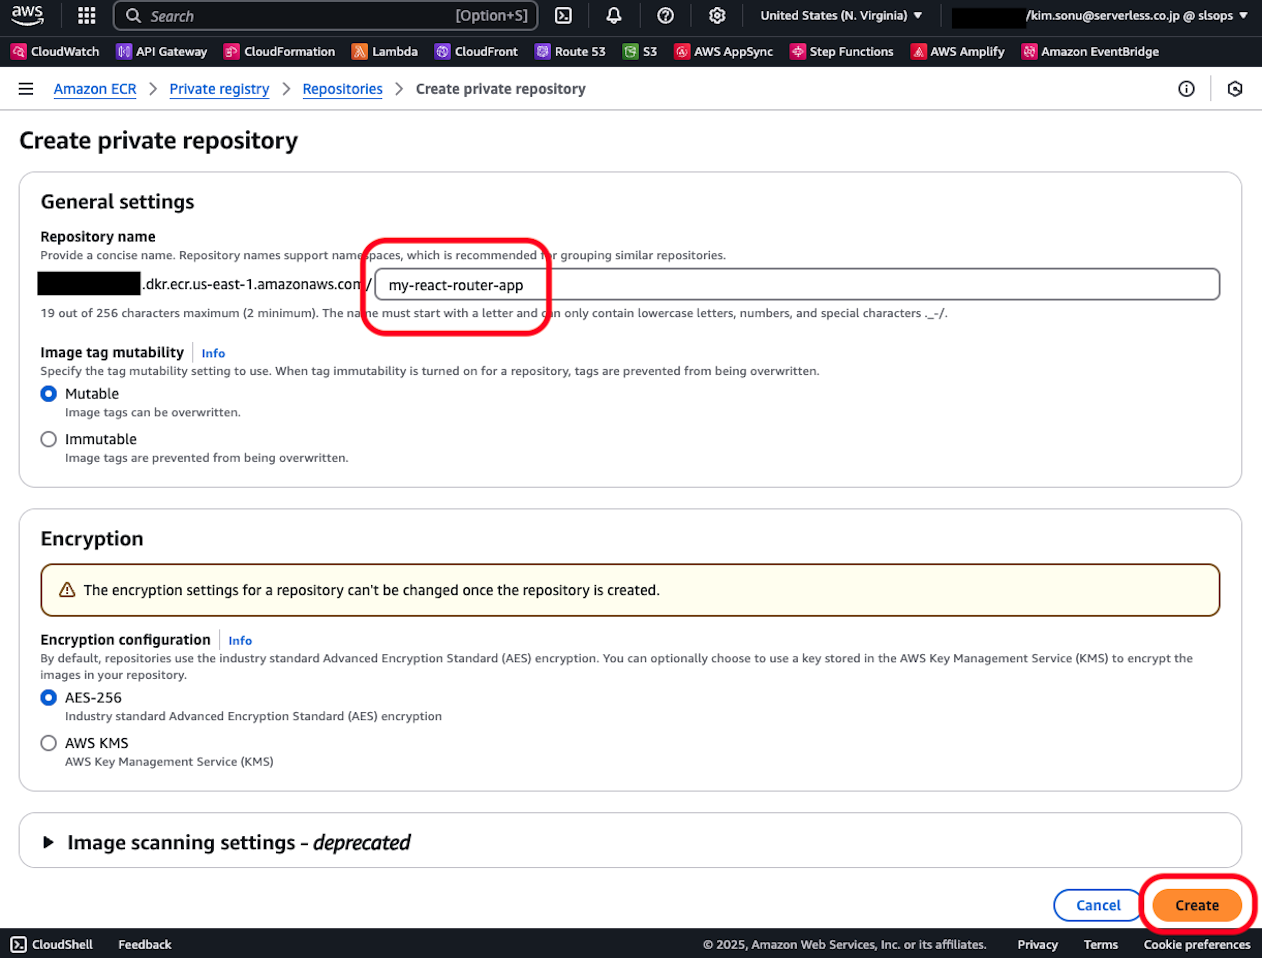
For verification purposes, enter only the repository name and proceed to create with other settings as default. Please configure image tag overwrite permissions and encryption appropriately according to your project requirements.
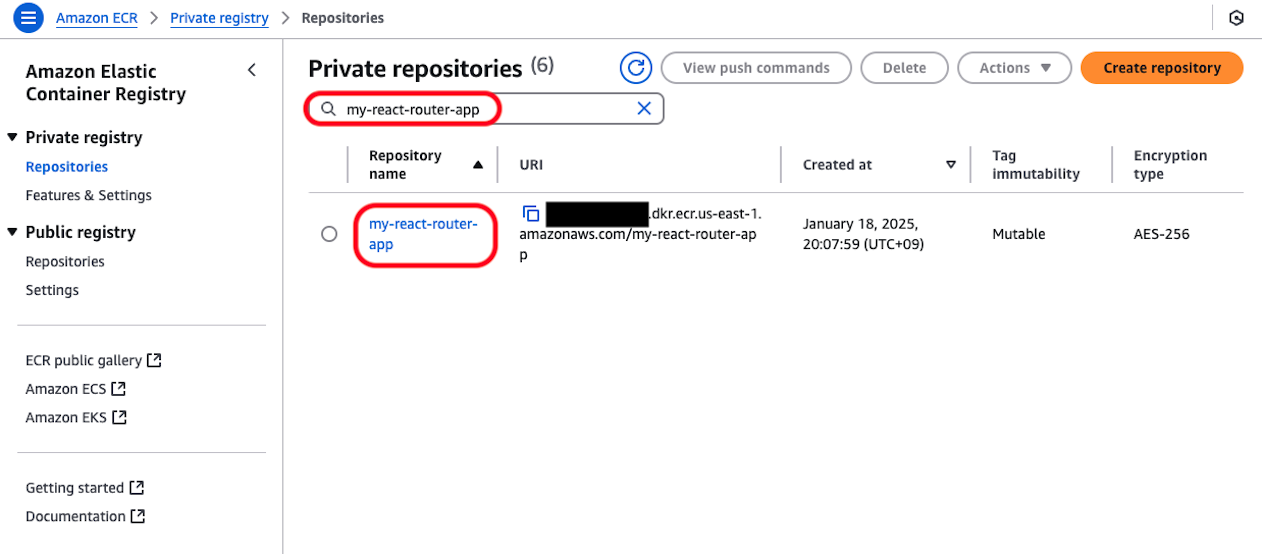
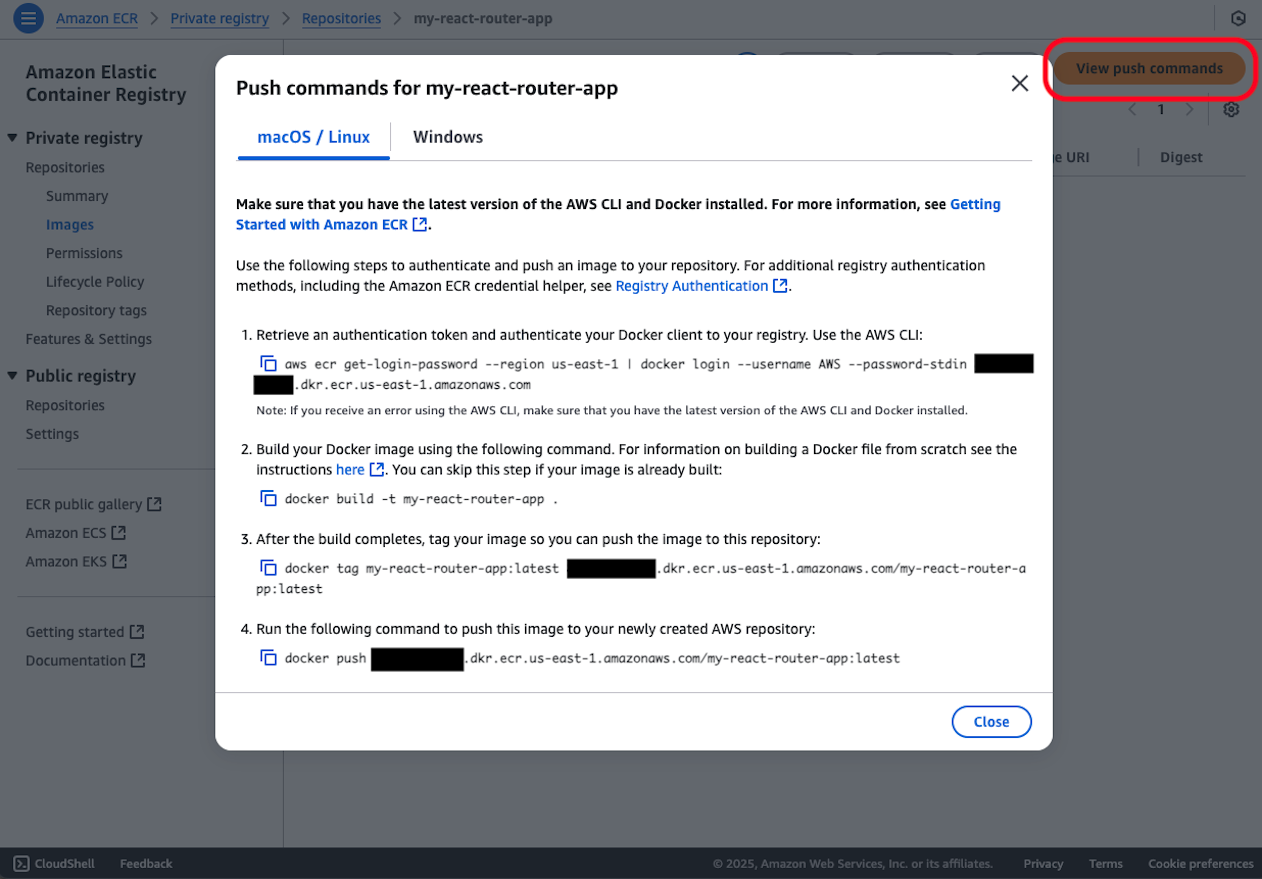
Search for the created repository by name and click on the repository name.
Press the push commands view button to confirm that the command list is displayed. The commands displayed here will be used later during deployment work, but for now, just familiarize yourself with where these commands can be displayed. There's no need to think up or edit these commands from scratch.
Create Lambda@Edge
When accessing CloudFront -> Lambda Function URL, it's necessary to resolve IAM authentication for Lambda Function URL. For GET requests, this can be resolved with CloudFront's standard OAC (Origin Access Control), but for requests containing Request Body such as POST/PUT, it's necessary to include content payload signatures (x-amz-content-sha256) in addition to OAC.
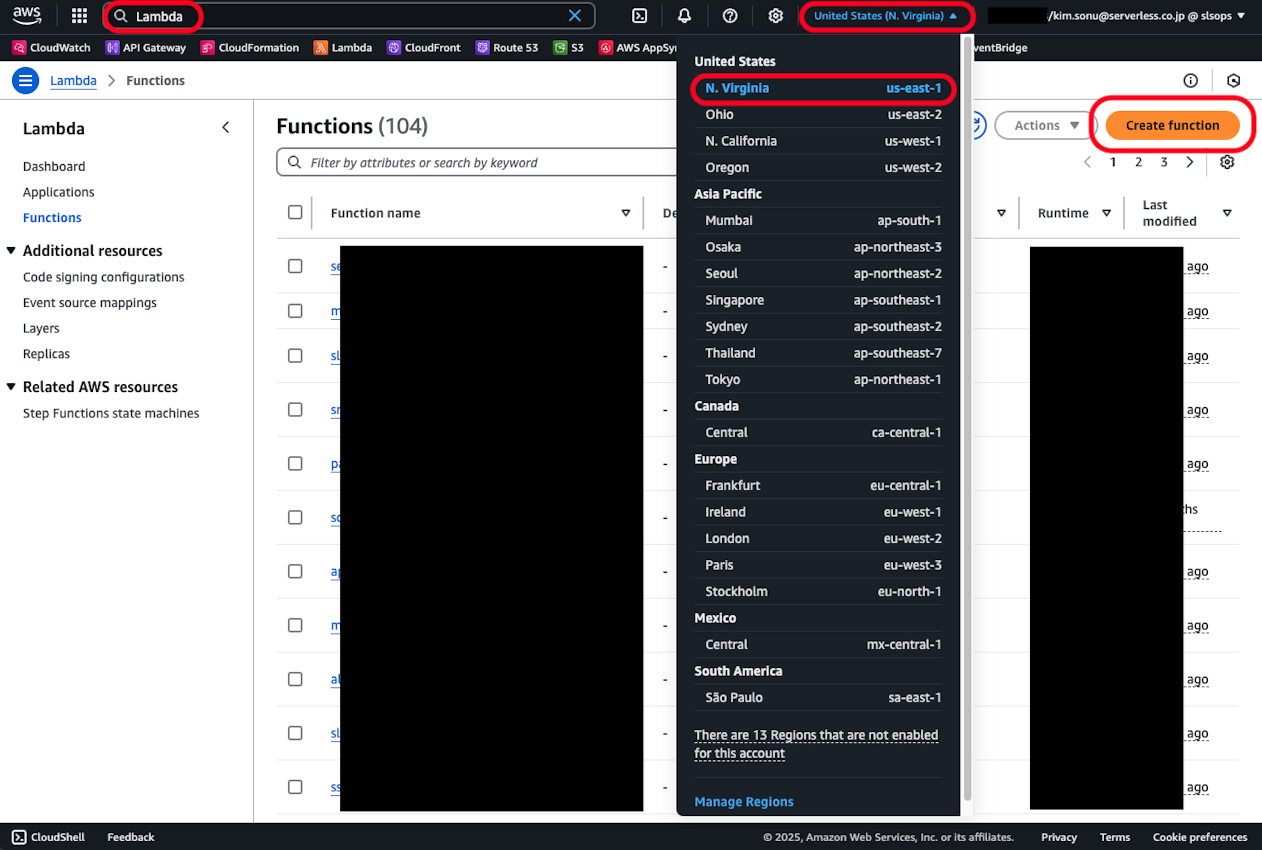
Below, create a new function from the AWS Lambda console. Note that Lambda@Edge must be created in the us-east-1 region, so switch regions if you were creating in another region.
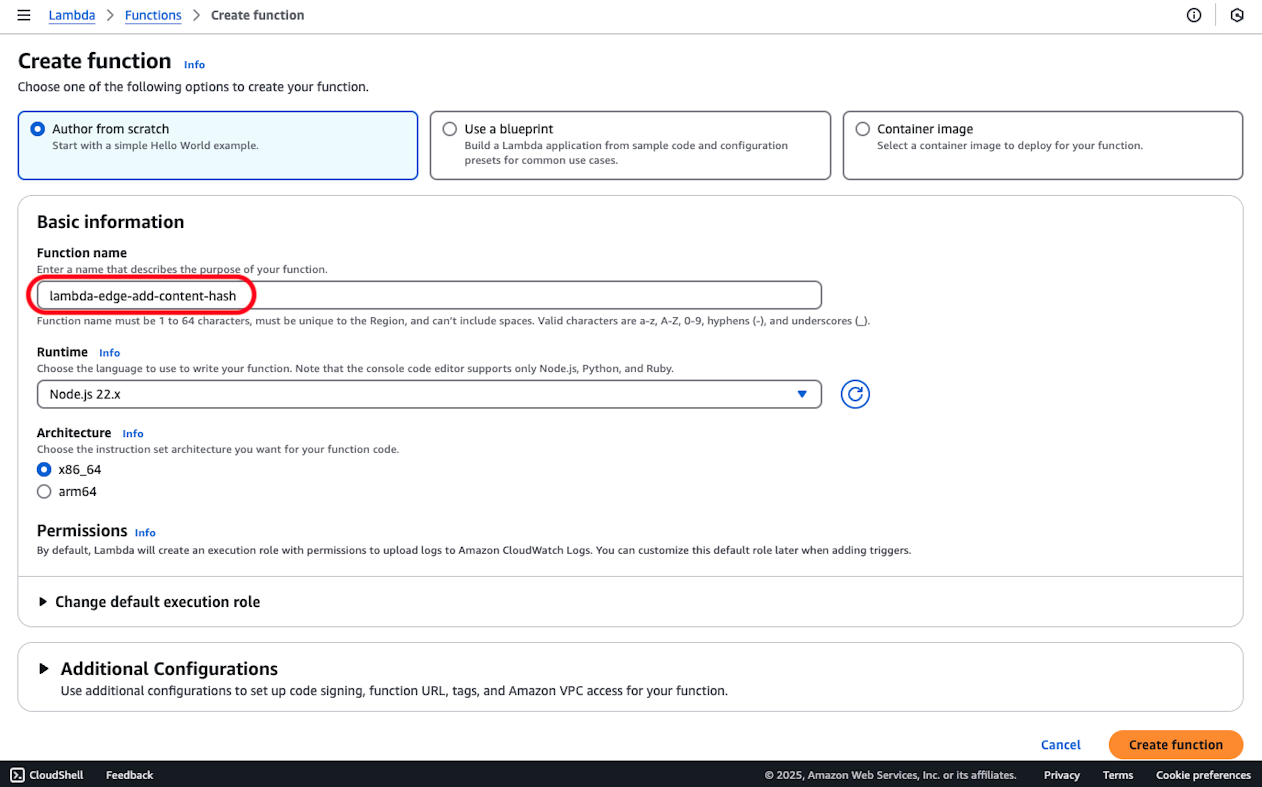
Enter the function name, confirm that the runtime is Node.js 22 and the architecture is x86, then create the function.
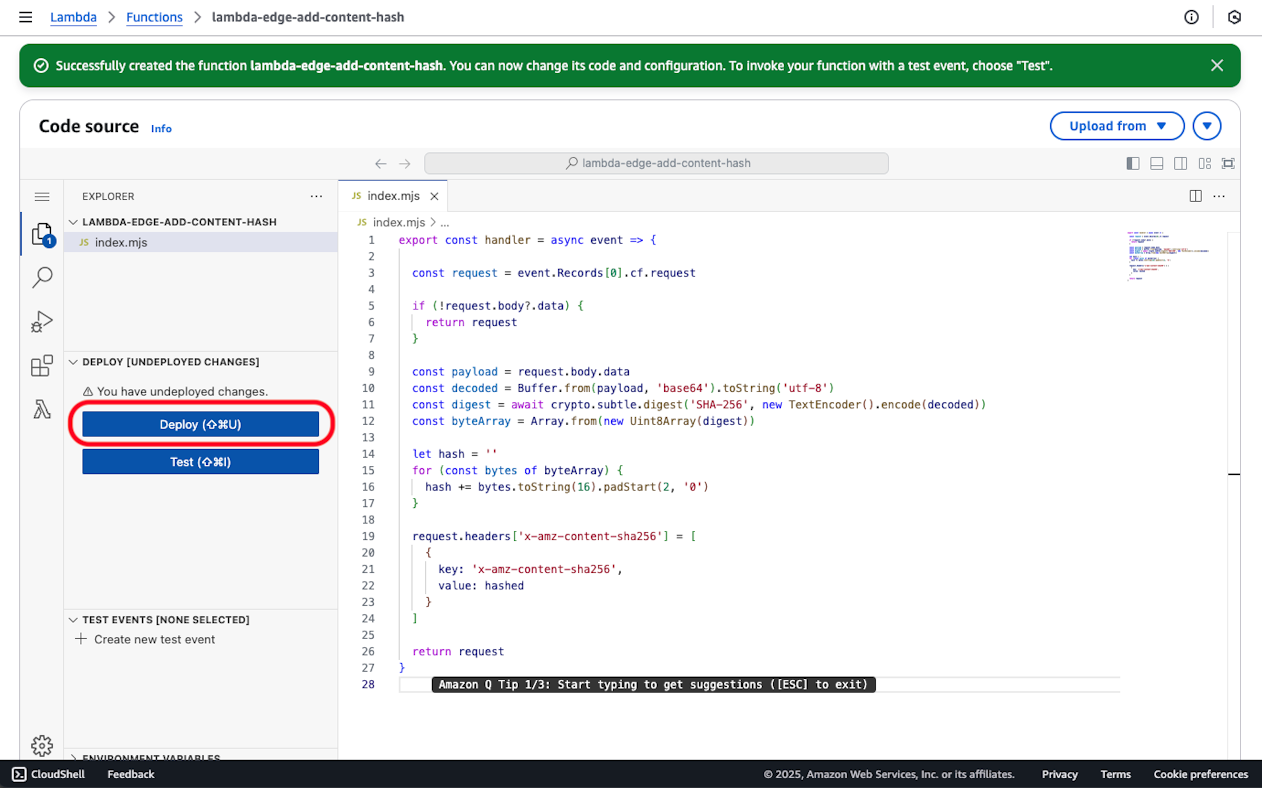
Edit the code as follows on the created AWS Lambda console.
export const handler = async event => {

  const request = event.Records[0].cf.request

  if (!request.body?.data) {
    return request
  }

  const payload = request.body.data
  const decoded = Buffer.from(payload, 'base64').toString('utf-8')
  const digest = await crypto.subtle.digest('SHA-256', new TextEncoder().encode(decoded))
  const byteArray = Array.from(new Uint8Array(digest))

  let hash = ''
  for (const bytes of byteArray) {
    hash += bytes.toString(16).padStart(2, '0')
  }

  request.headers['x-amz-content-sha256'] = [
    {
      key: 'x-amz-content-sha256',
      value: hash
    }
  ]

  return request
}
After entering the code, press the deploy button to update.
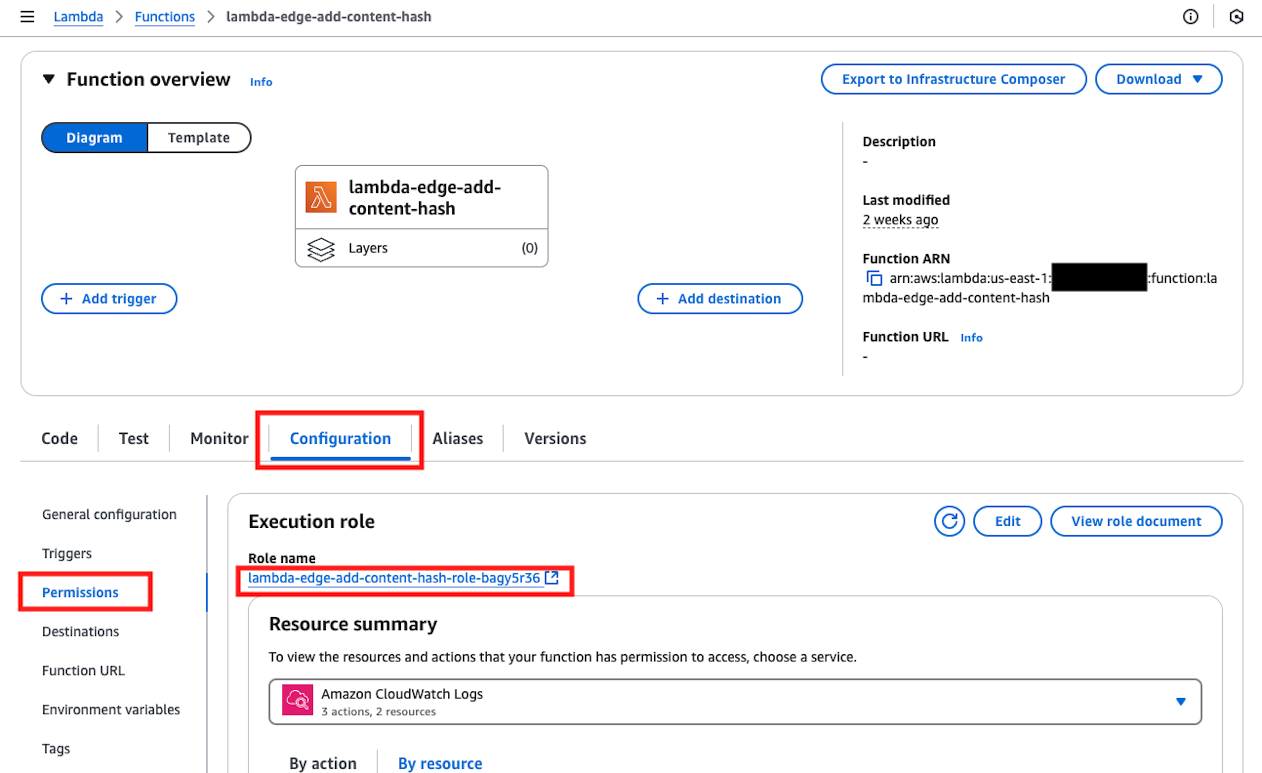
Next, click on the role name in Configuration > Permission.
Click on the Trust Relationships tab and press the edit button.
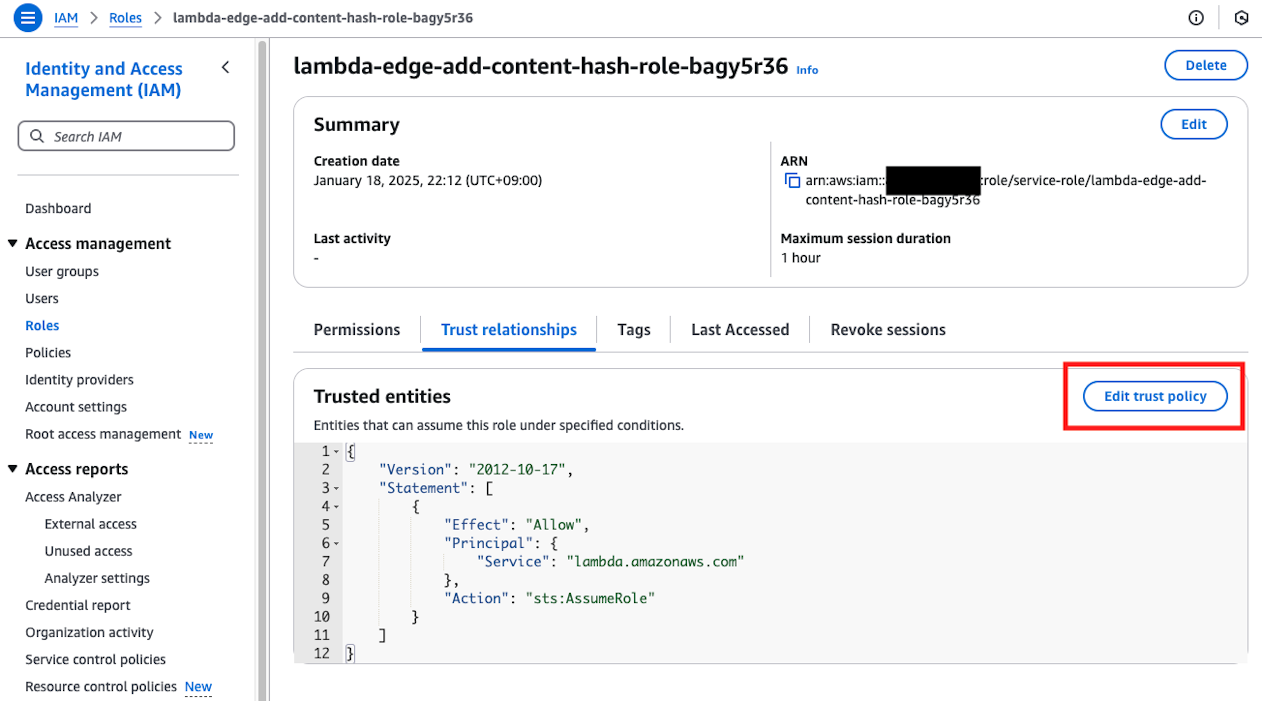
In the edit screen, change Statement.Principal.Service to an array and add edgelambda.amazonaws.com as follows.
{
  "Version": "2012-10-17",
  "Statement": [
    {
      "Effect": "Allow",
      "Principal": {
        "Service": [
            "lambda.amazonaws.com",
            "edgelambda.amazonaws.com"
        ]
      },
      "Action": "sts:AssumeRole"
    }
  ]
}
This completes the Lambda@Edge preparation for now.
Build React Router v7
Remix v2 has merged with React Router, and from React Router v7, both framework (SSR) and library (SPA) usage methods are available. From here, we'll build assuming framework mode usage.
Check the Dockerfile described in Catalog Overview, open the commands displayed when creating the ECR repository, and perform Docker build and push.
Create and Deploy AWS Lambda and Amazon CloudFront
From here, we'll proceed with full-scale deployment work. First, create the core AWS Lambda function. Open AWS Lambda from the AWS Management Console and press the create new function button.
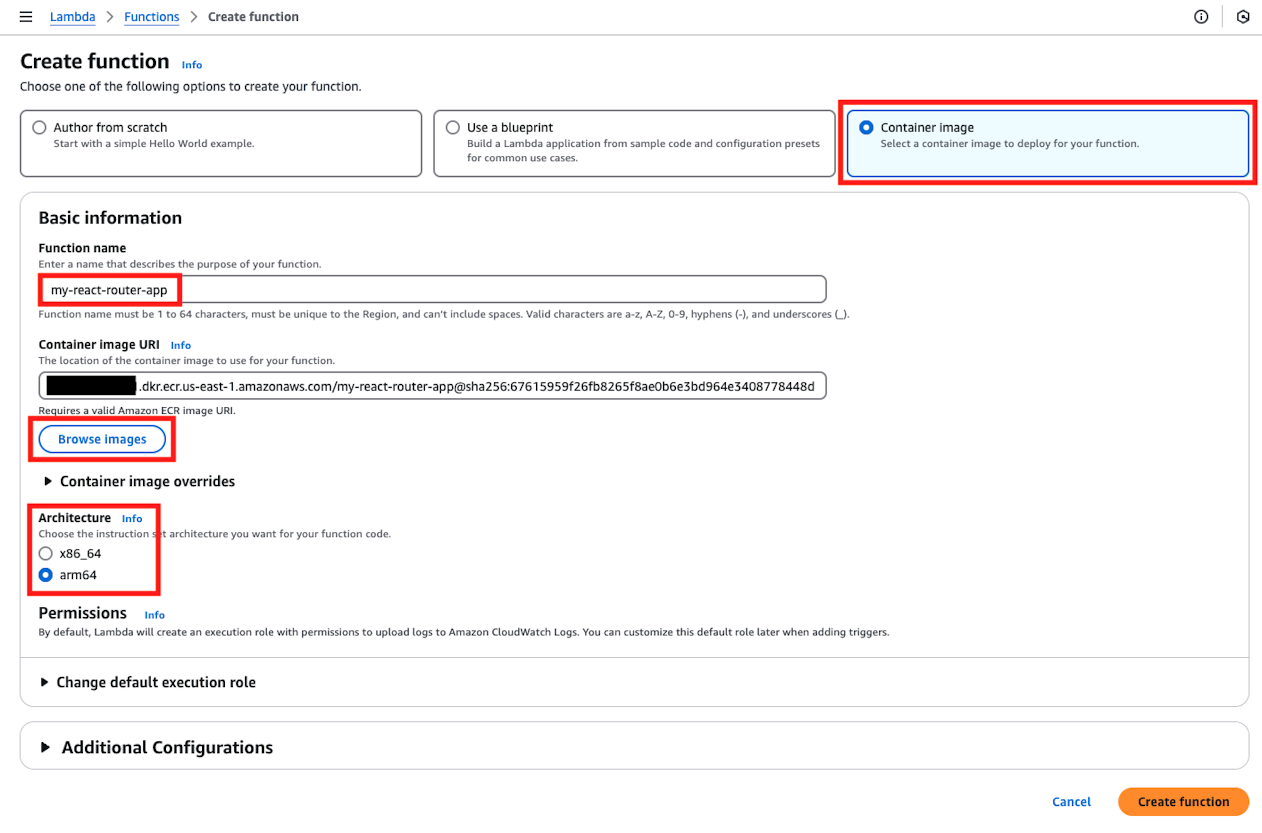
※ For the "Architecture" item, please match it to the environment where you created the Docker image. For example, if you built a container image in an environment using AWS Graviton processors such as m1/m2 mac or t4g instance types, it would be arm64. Otherwise, you would normally select x86_64.
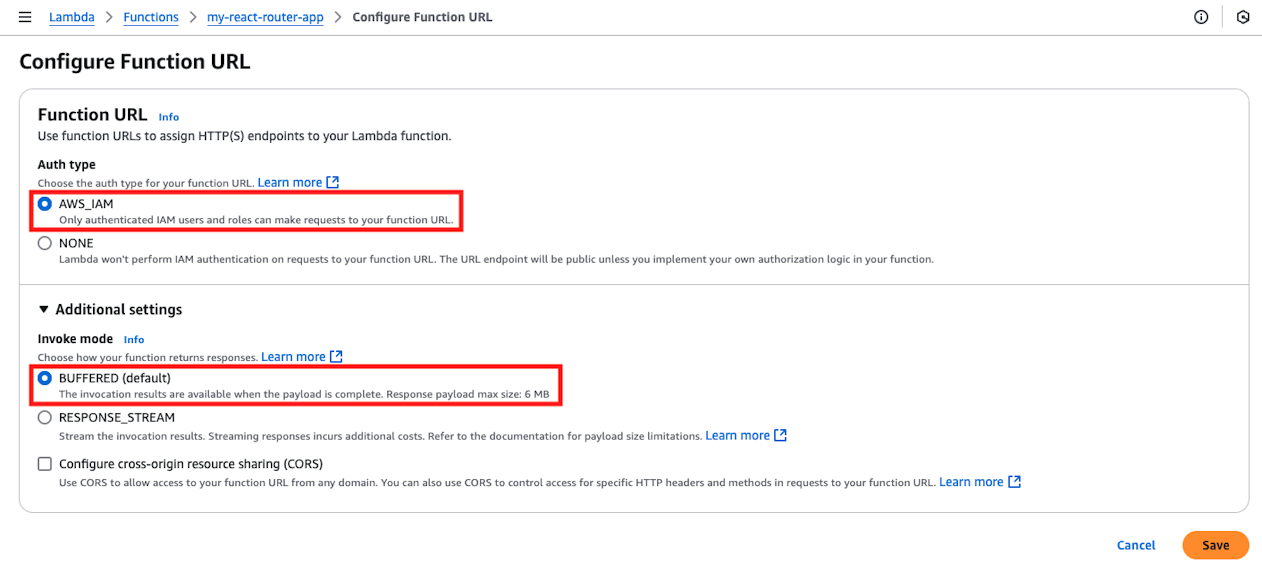
Immediately after creation, the default memory size and timeout values are too small as shown below, so press the Edit button to set them to 256MB and 20 seconds respectively. Also, configure Function URL from the following screen.
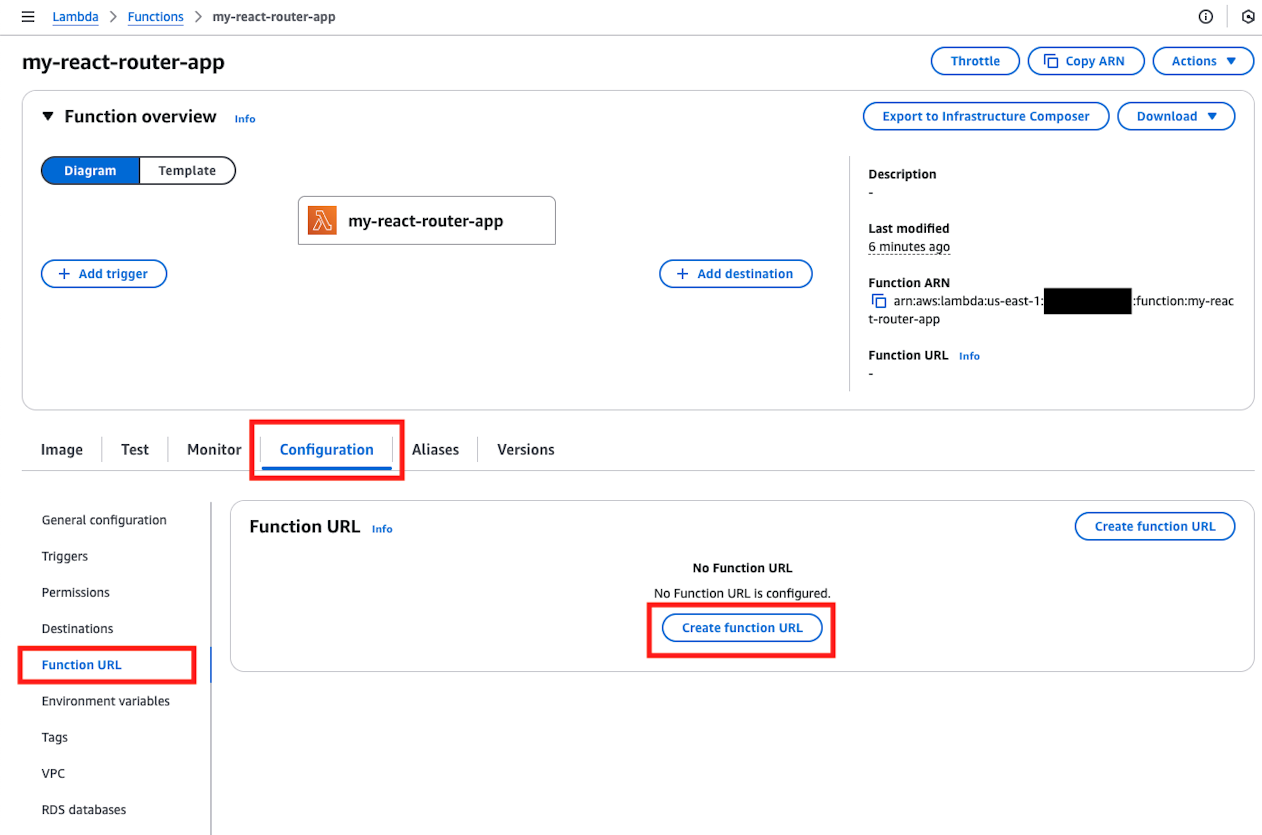
Select as follows to create Function URL.
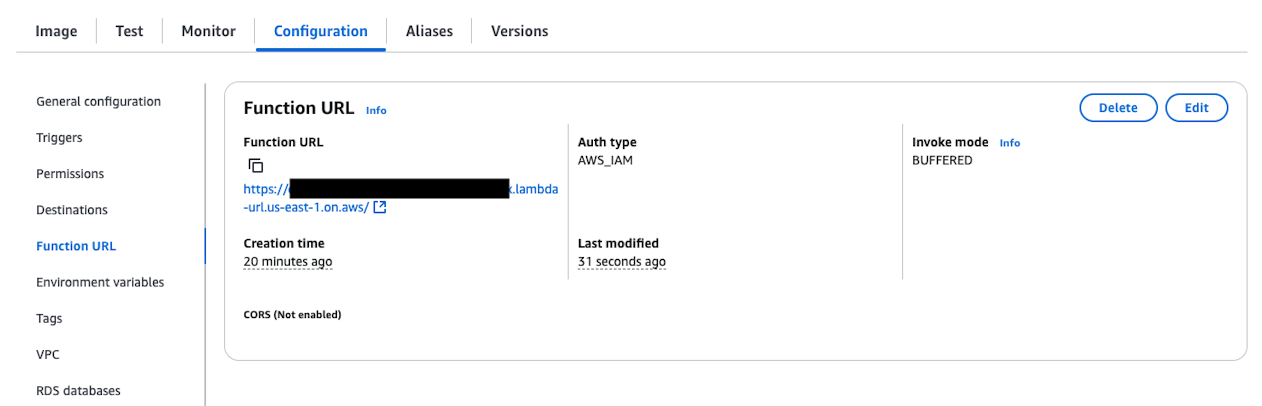
When creation is complete, you can confirm the Function URL as follows.
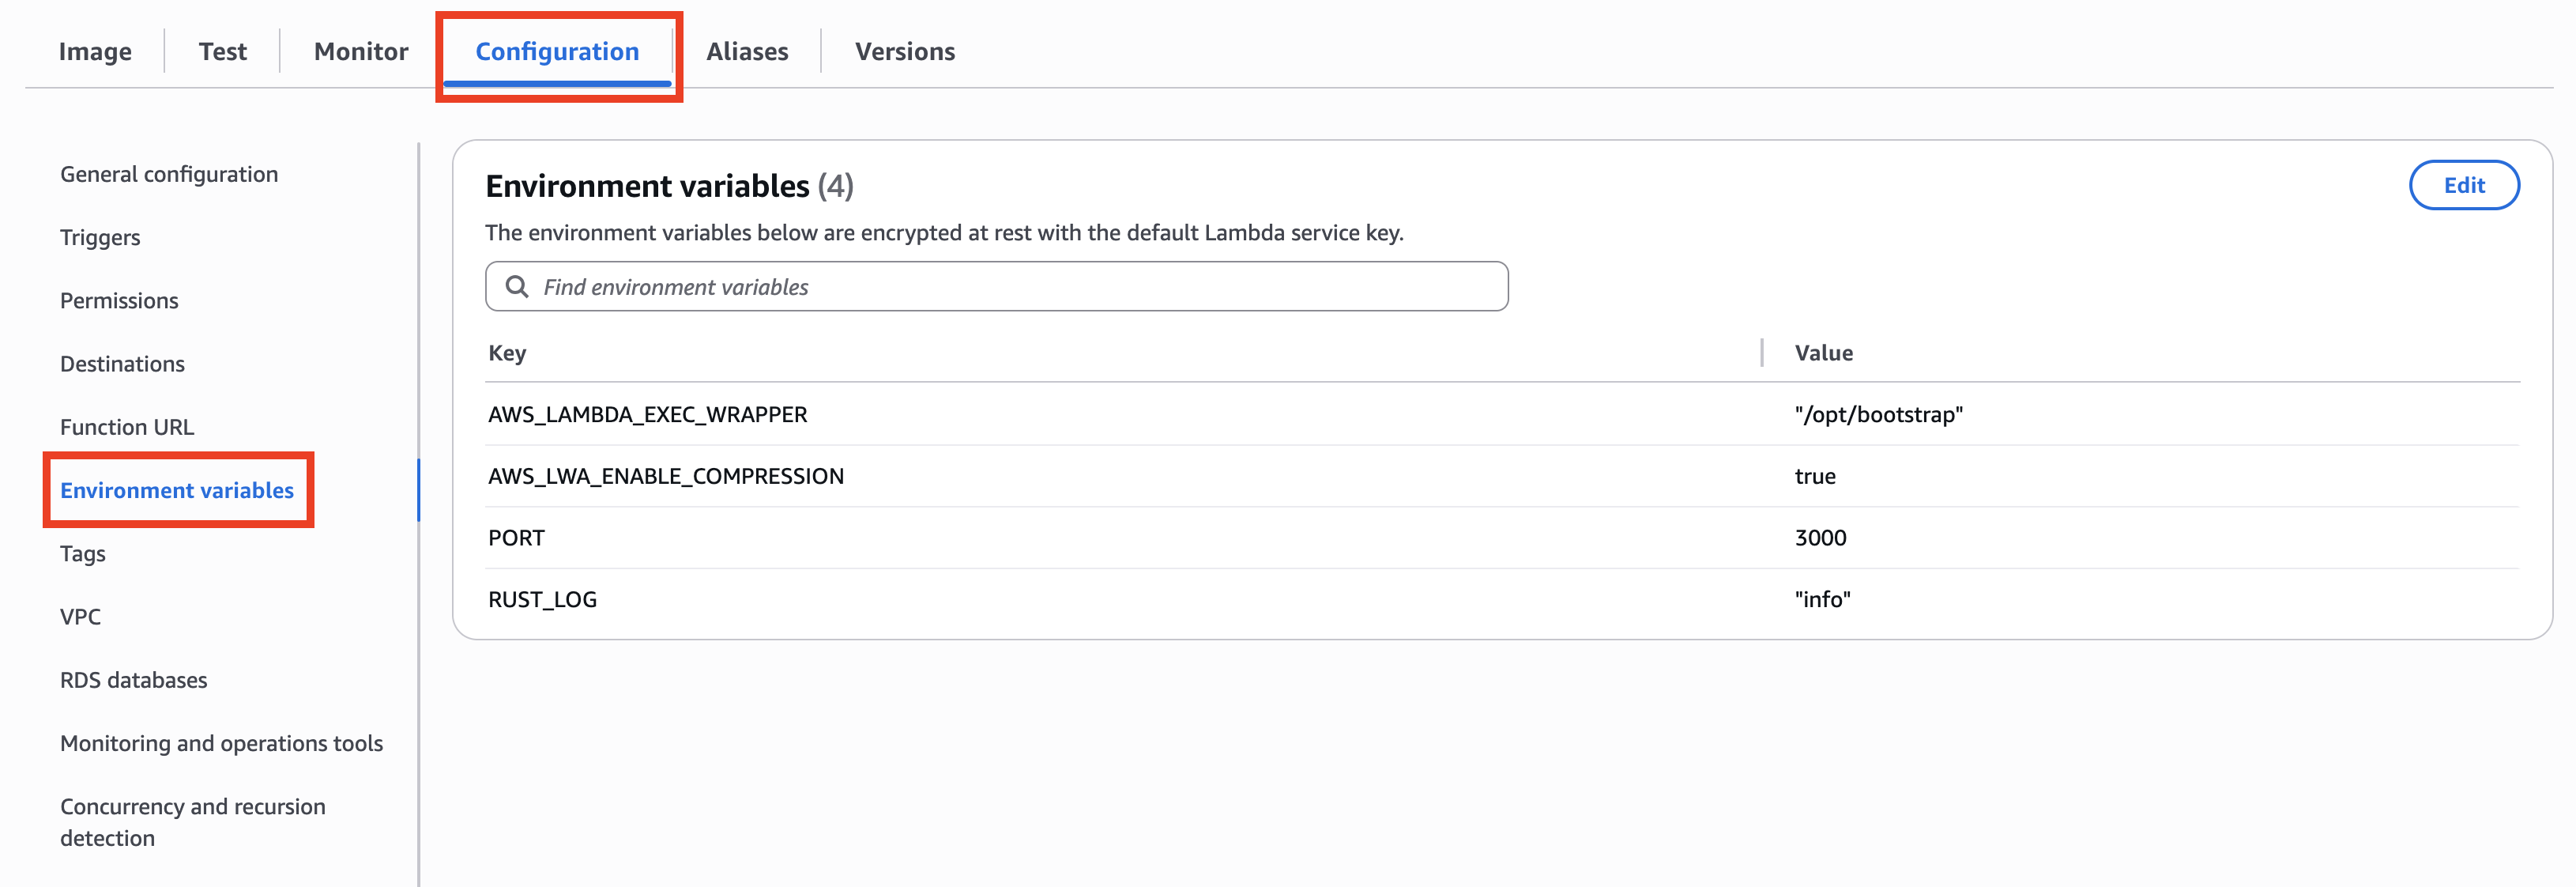
Set the environment variables. Configure the following variables in Environment variables under the Configuration tab.
| Key | Value |
|---|---|
| AWS_LAMBDA_EXEC_WRAPPER | "/opt/bootstrap" |
| AWS_LWA_ENABLE_COMPRESSION | true |
| PORT | 3000 |
| RUST_LOG | "info" |
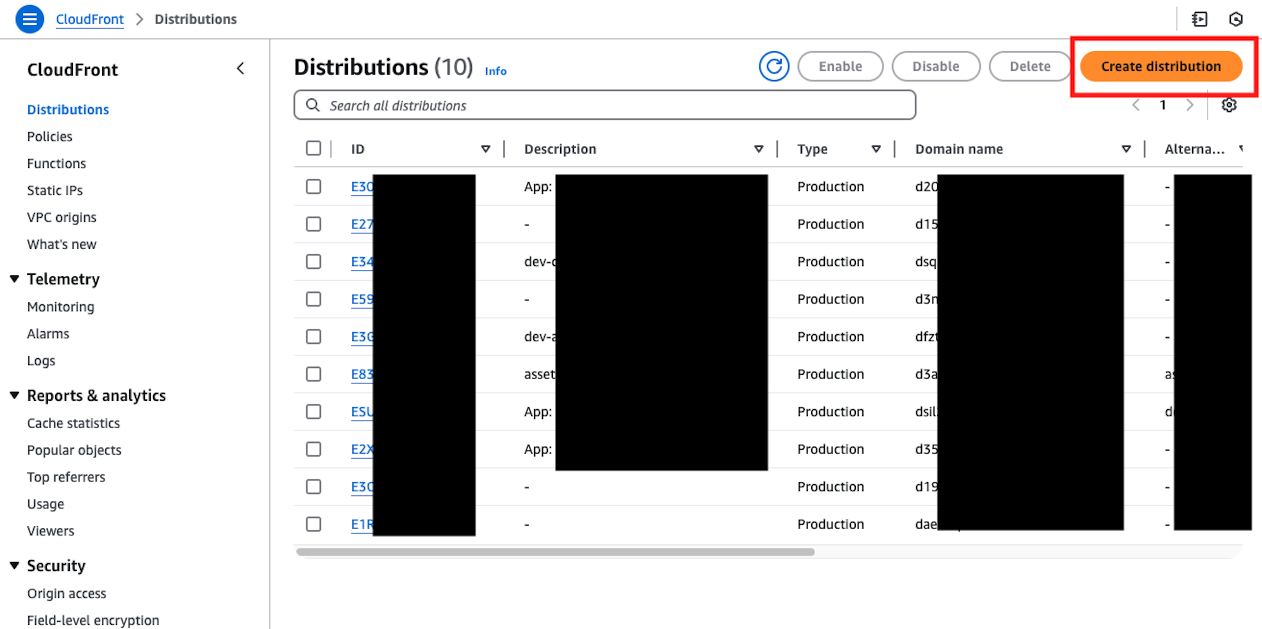
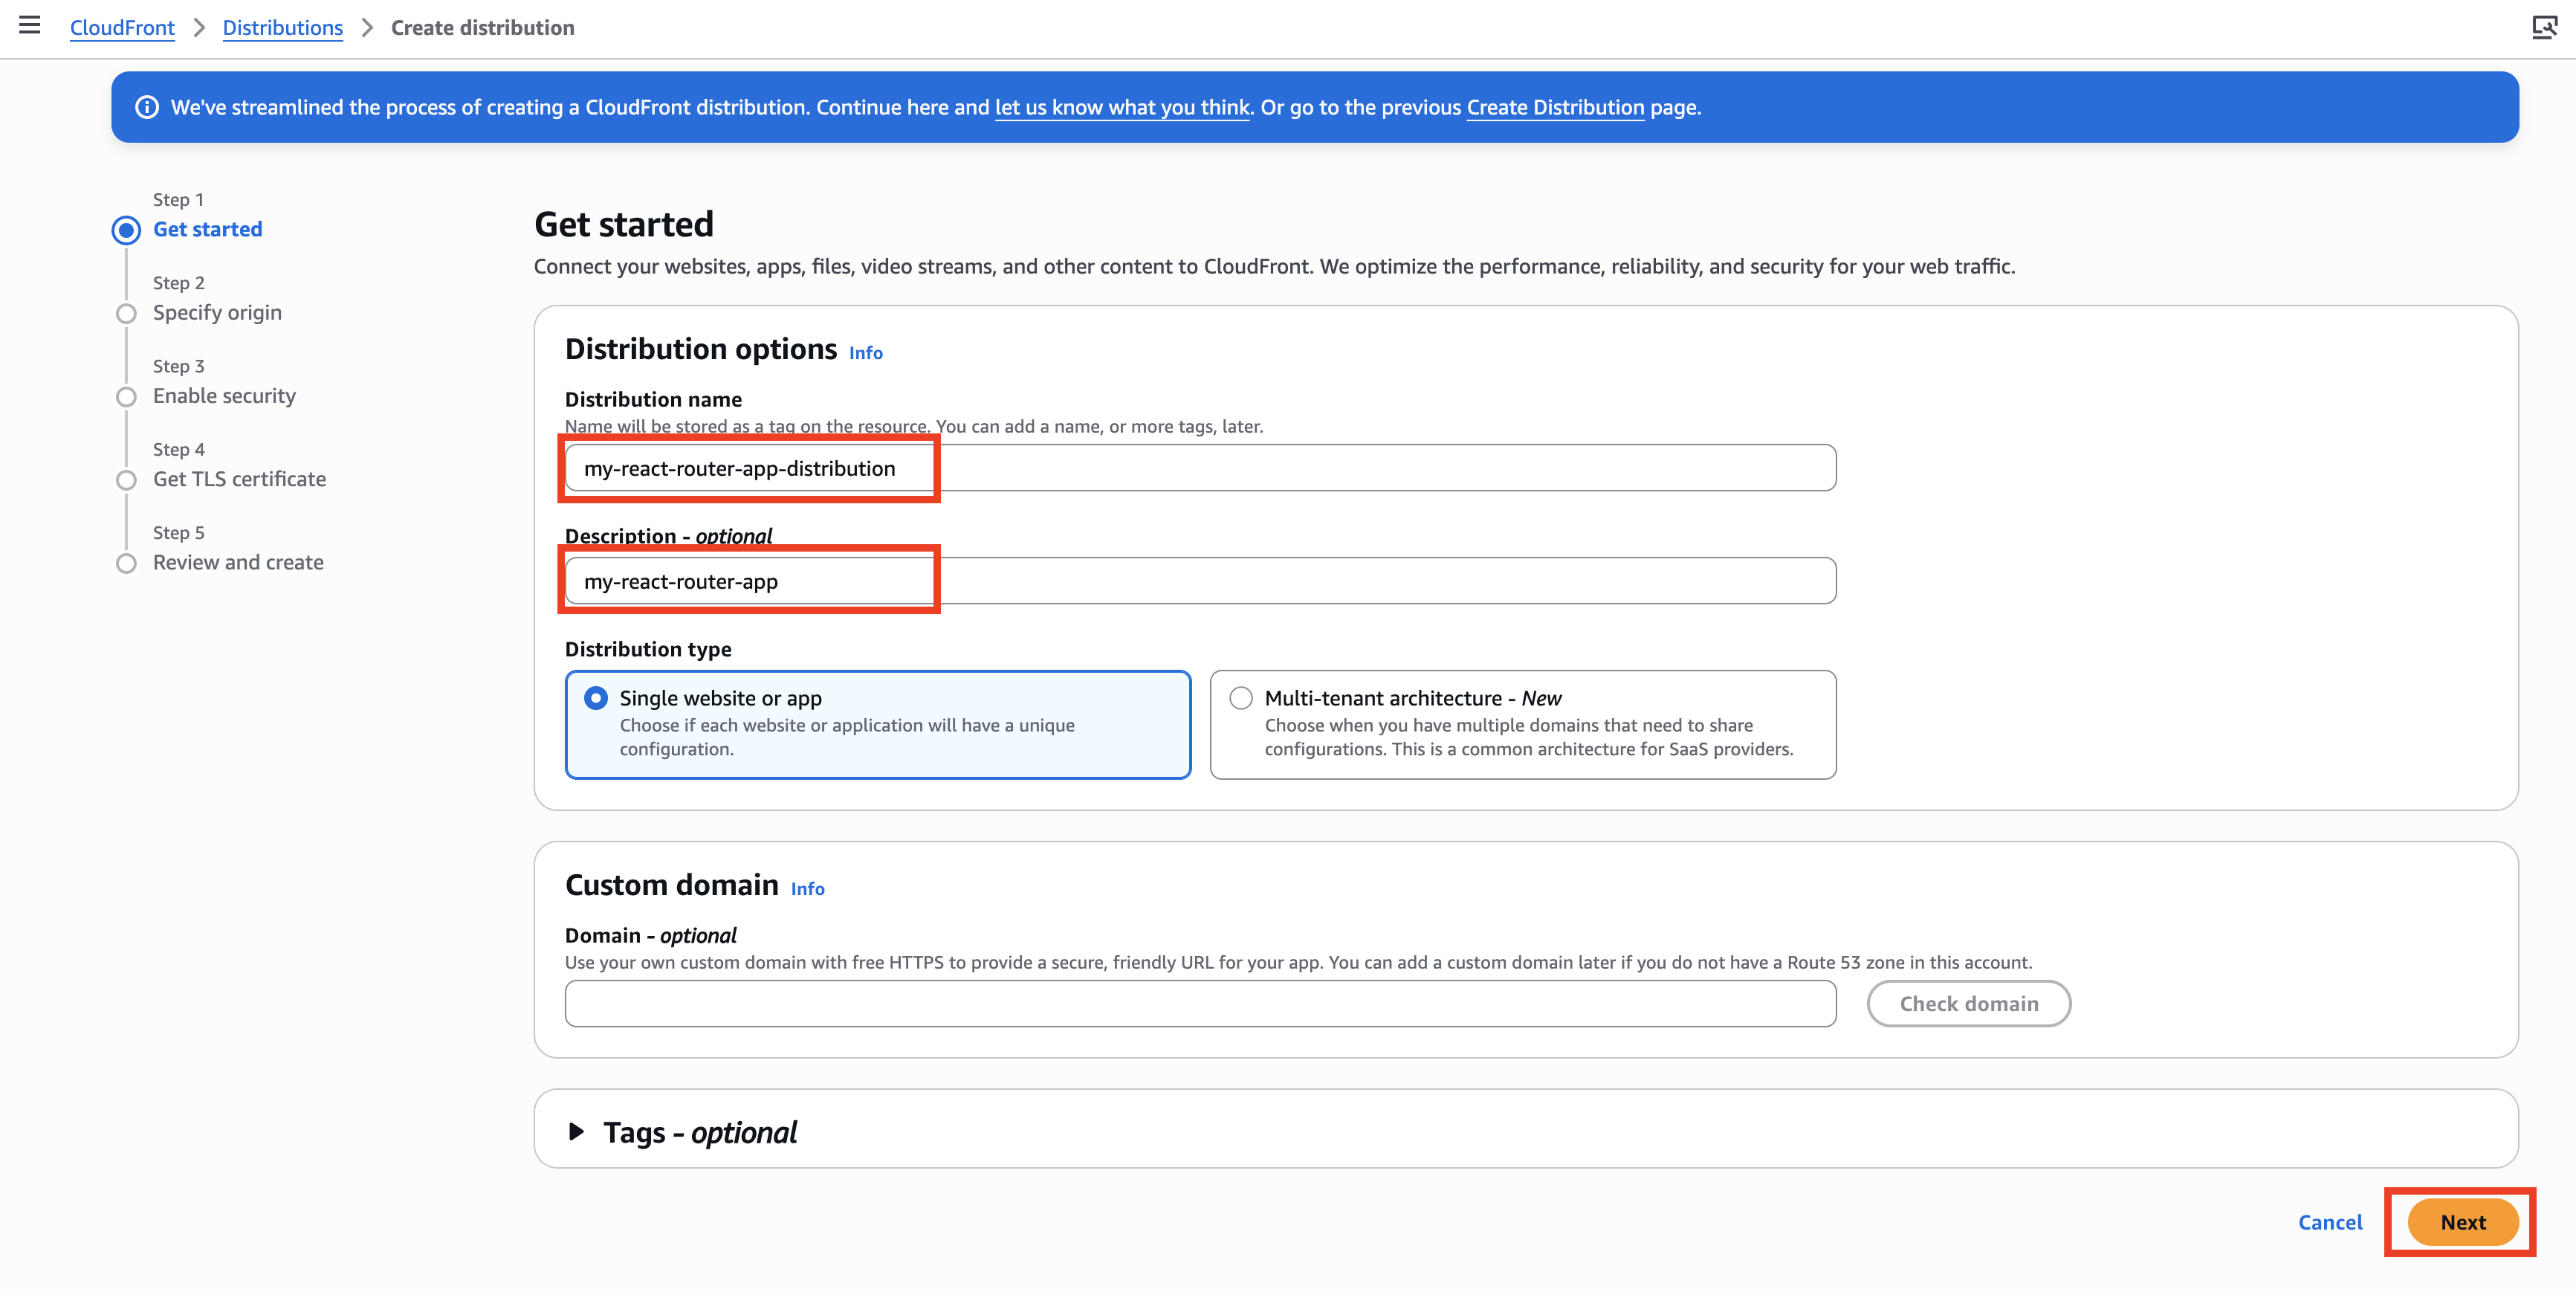
Next, create a CloudFront Distribution. Open the Amazon CloudFront console and press the create distribution button.
Enter the Distribution name and Description, then click NEXT. The Description field is optional, but it is recommended to provide one to help identify the distribution later.
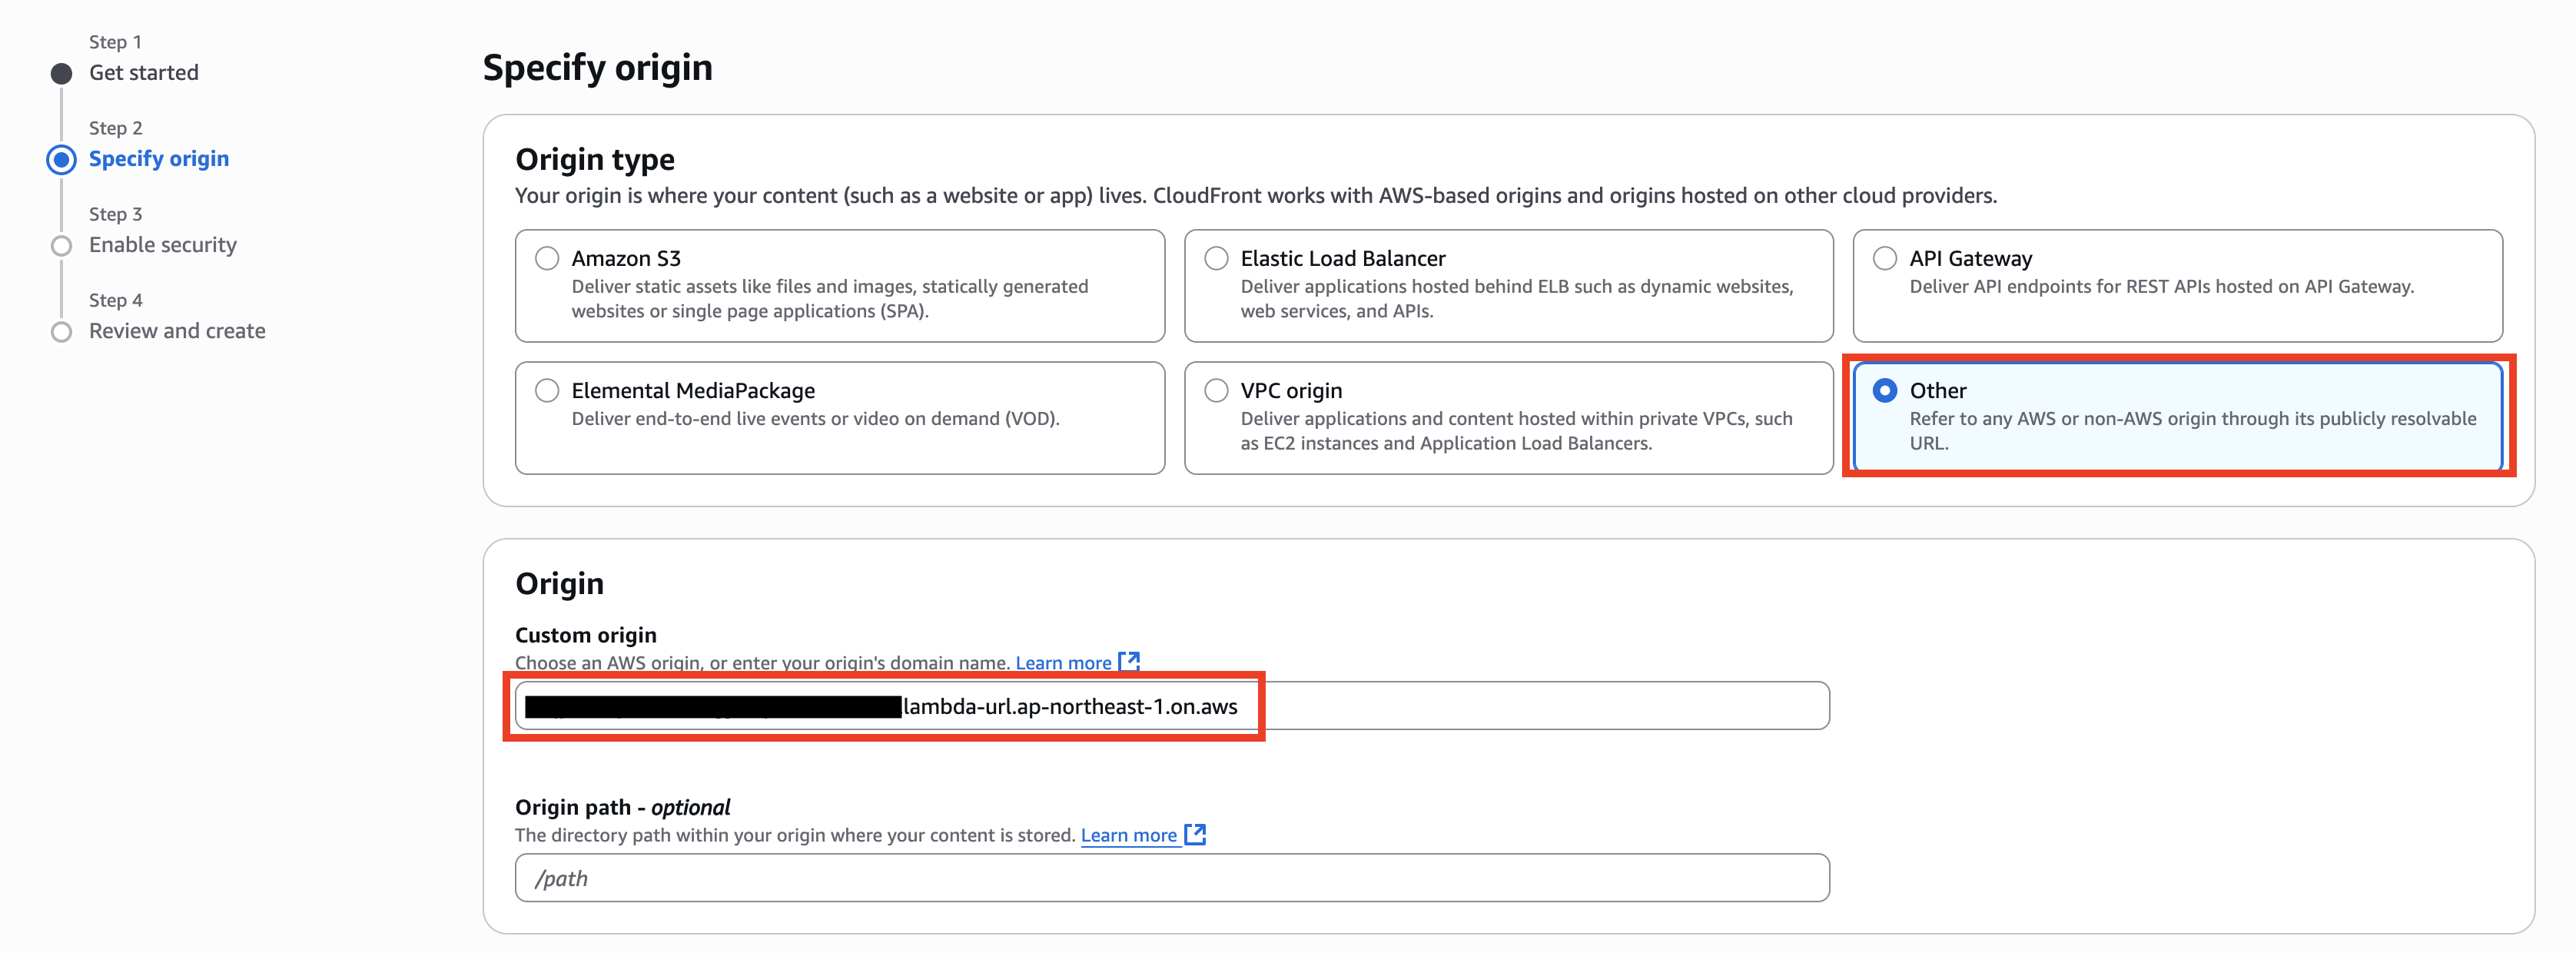
Select Other for the Origin type, enter the previously configured Function URL in Custom Origin, and then click Next.
Next, configure the AWS WAF section as follows. For WAF, it is also possible to enable and configure it later after creating the CloudFront distribution, if needed (e.g., setting IP address restrictions, bot mitigation, or applying AWS Managed Rules to protect against various types of attacks).

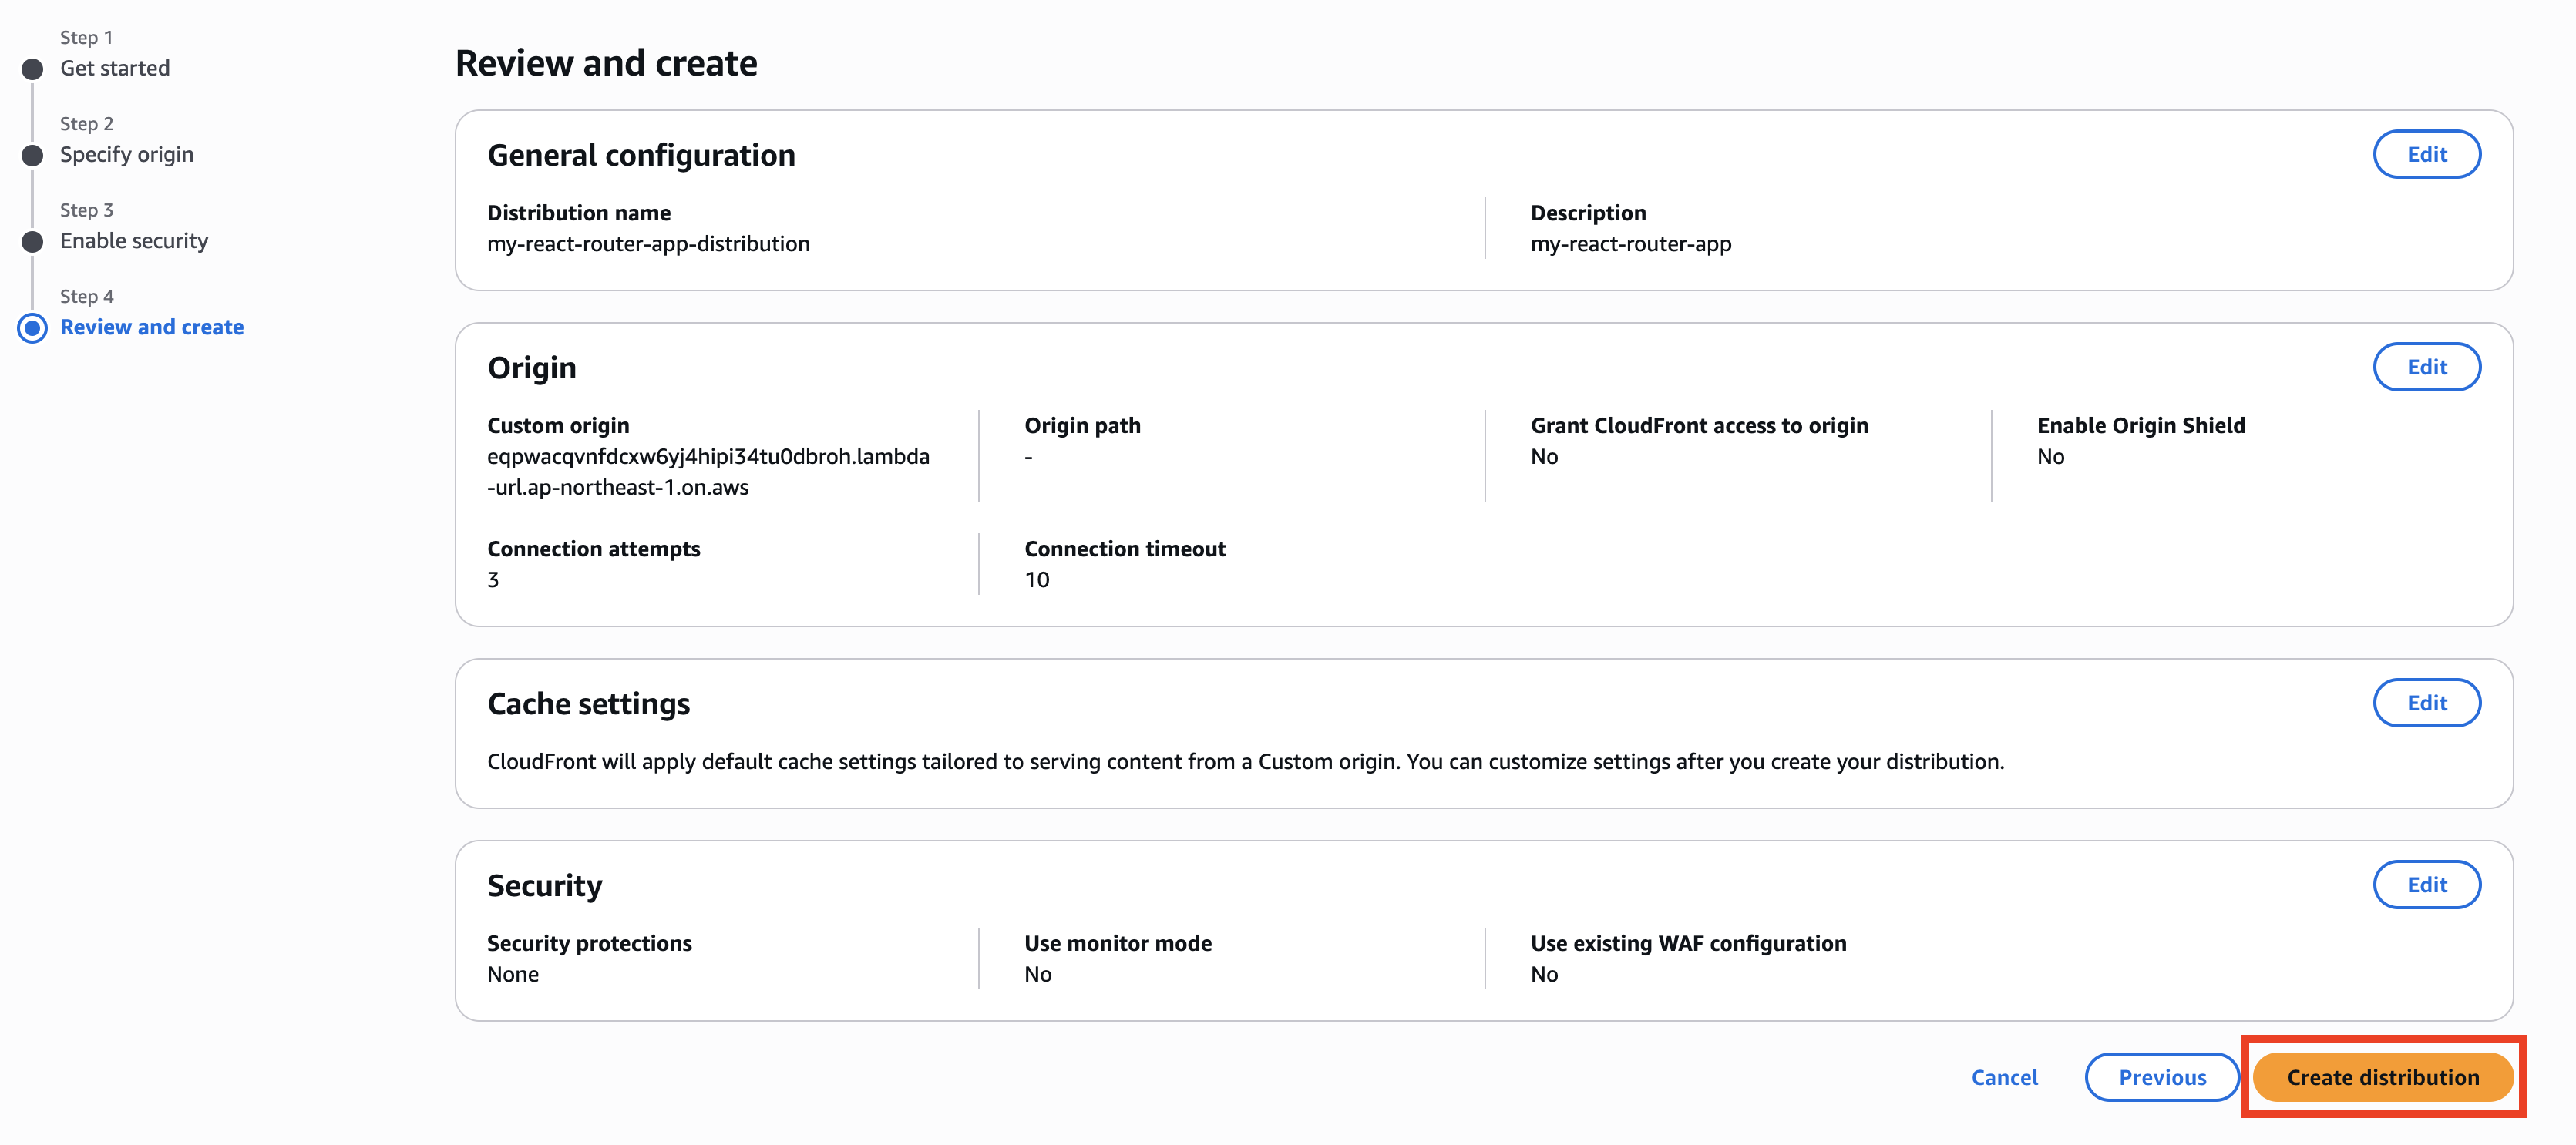
Click Create Distribution.
Select the distribution you just created again, go to the Origin tab, select the radio button for the desired origin under Origins, and then click Edit.

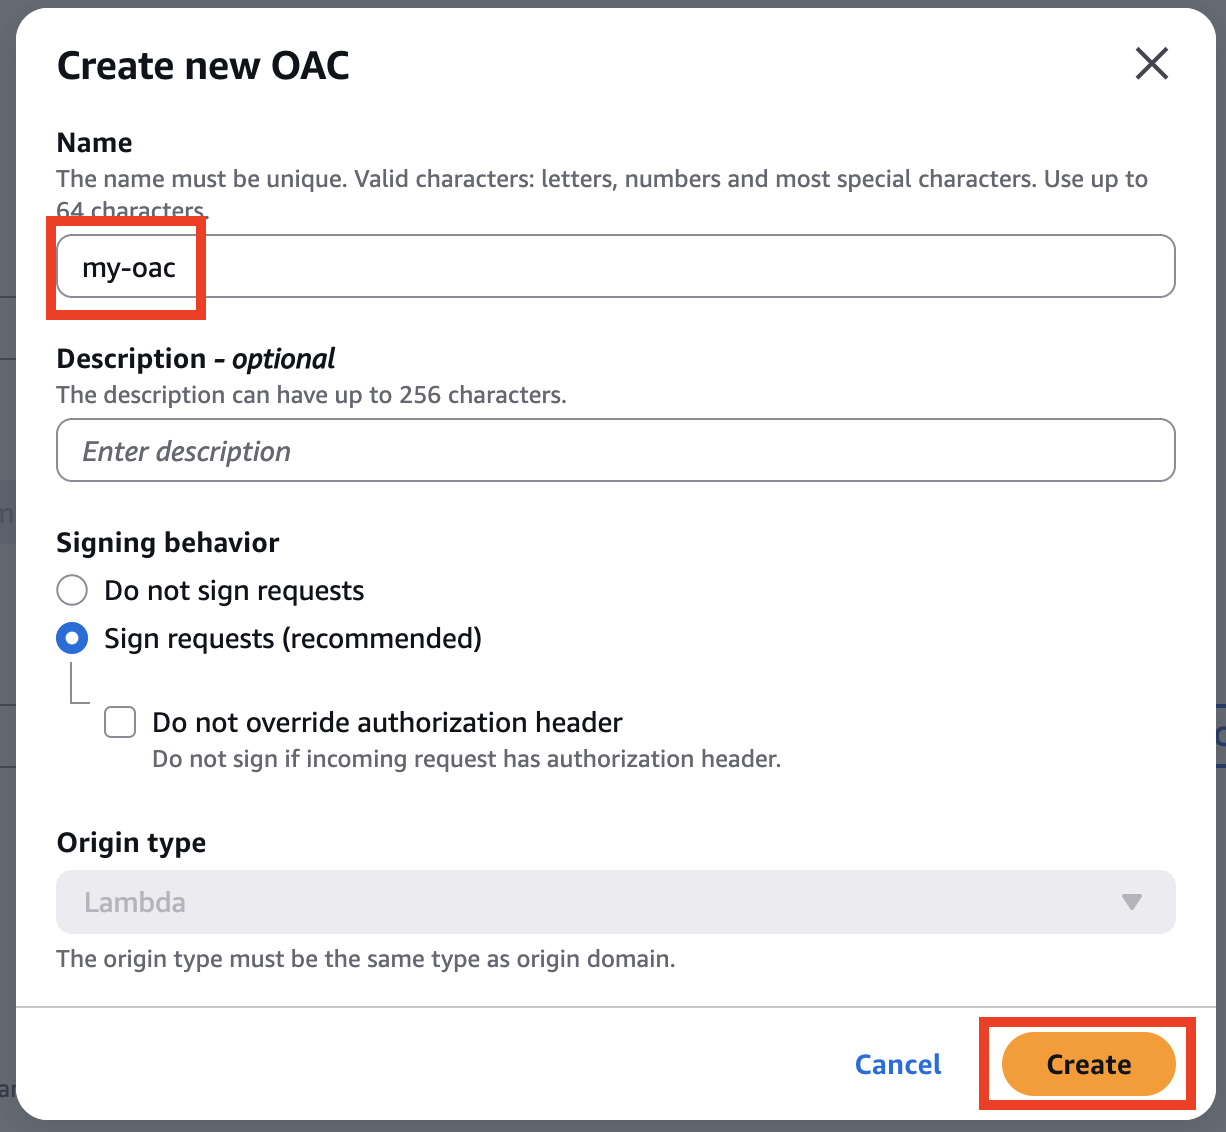
At the bottom of the page, locate the Origin access control menu and click Create new OAC.
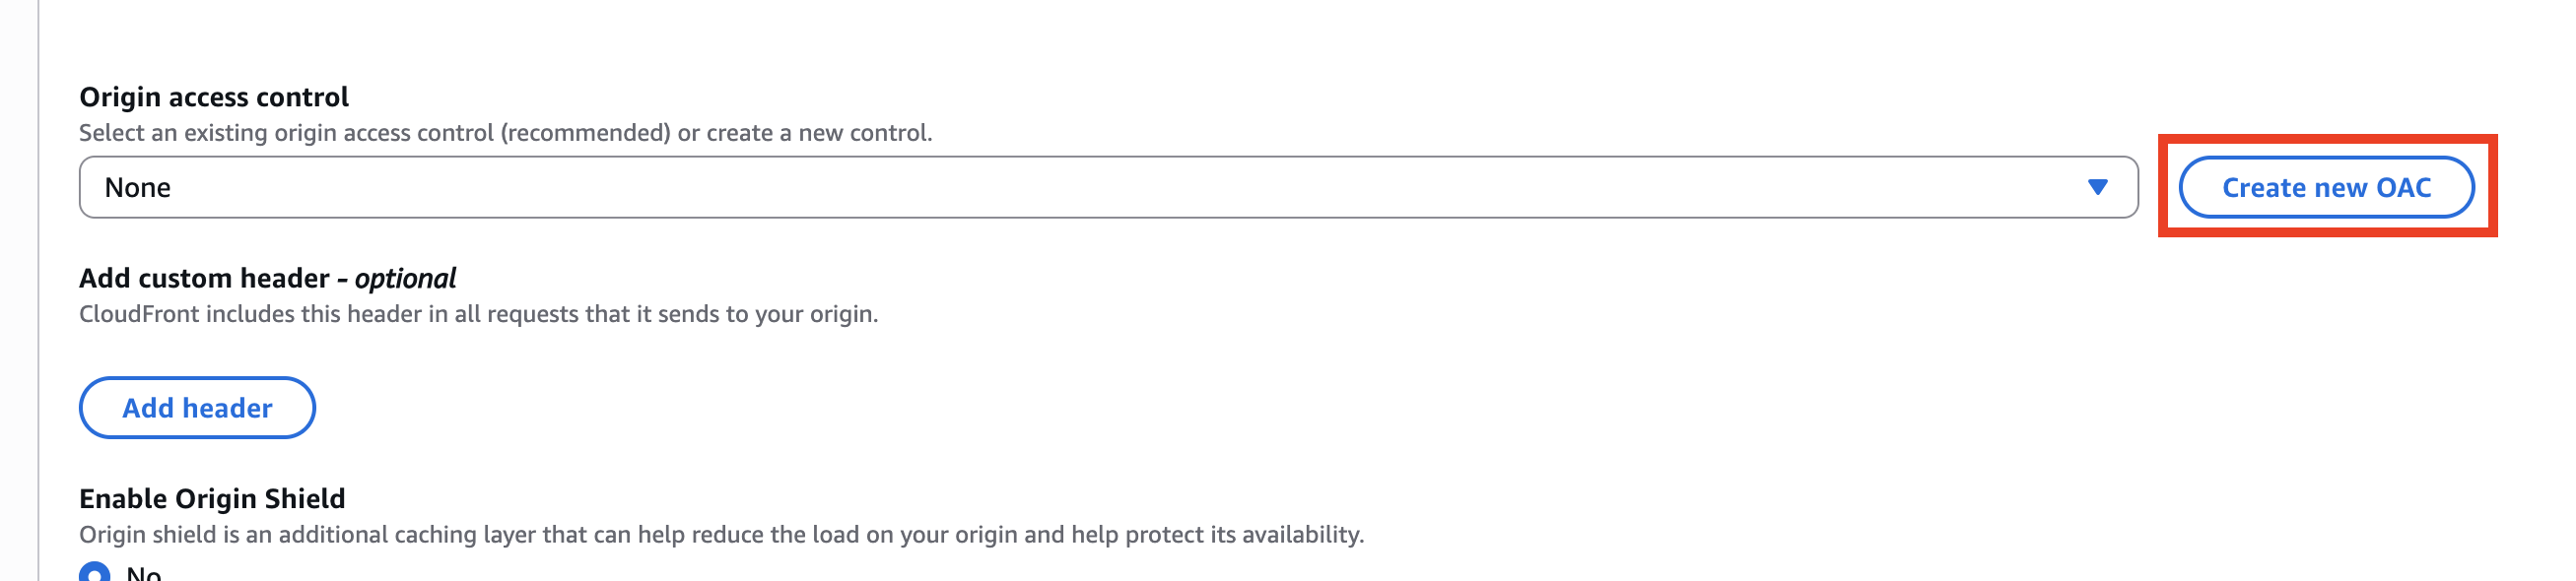
By default, the Function URL is entered in the Name field, but this may be too long and cause an error. Change it to a custom name of your choice, then click Create.
After clicking, you will return to the previous screen, where an AWS CLI command is displayed for granting a policy that allows CloudFront to access the Lambda function with the applied container image. Copy this command, then click Save Changes.
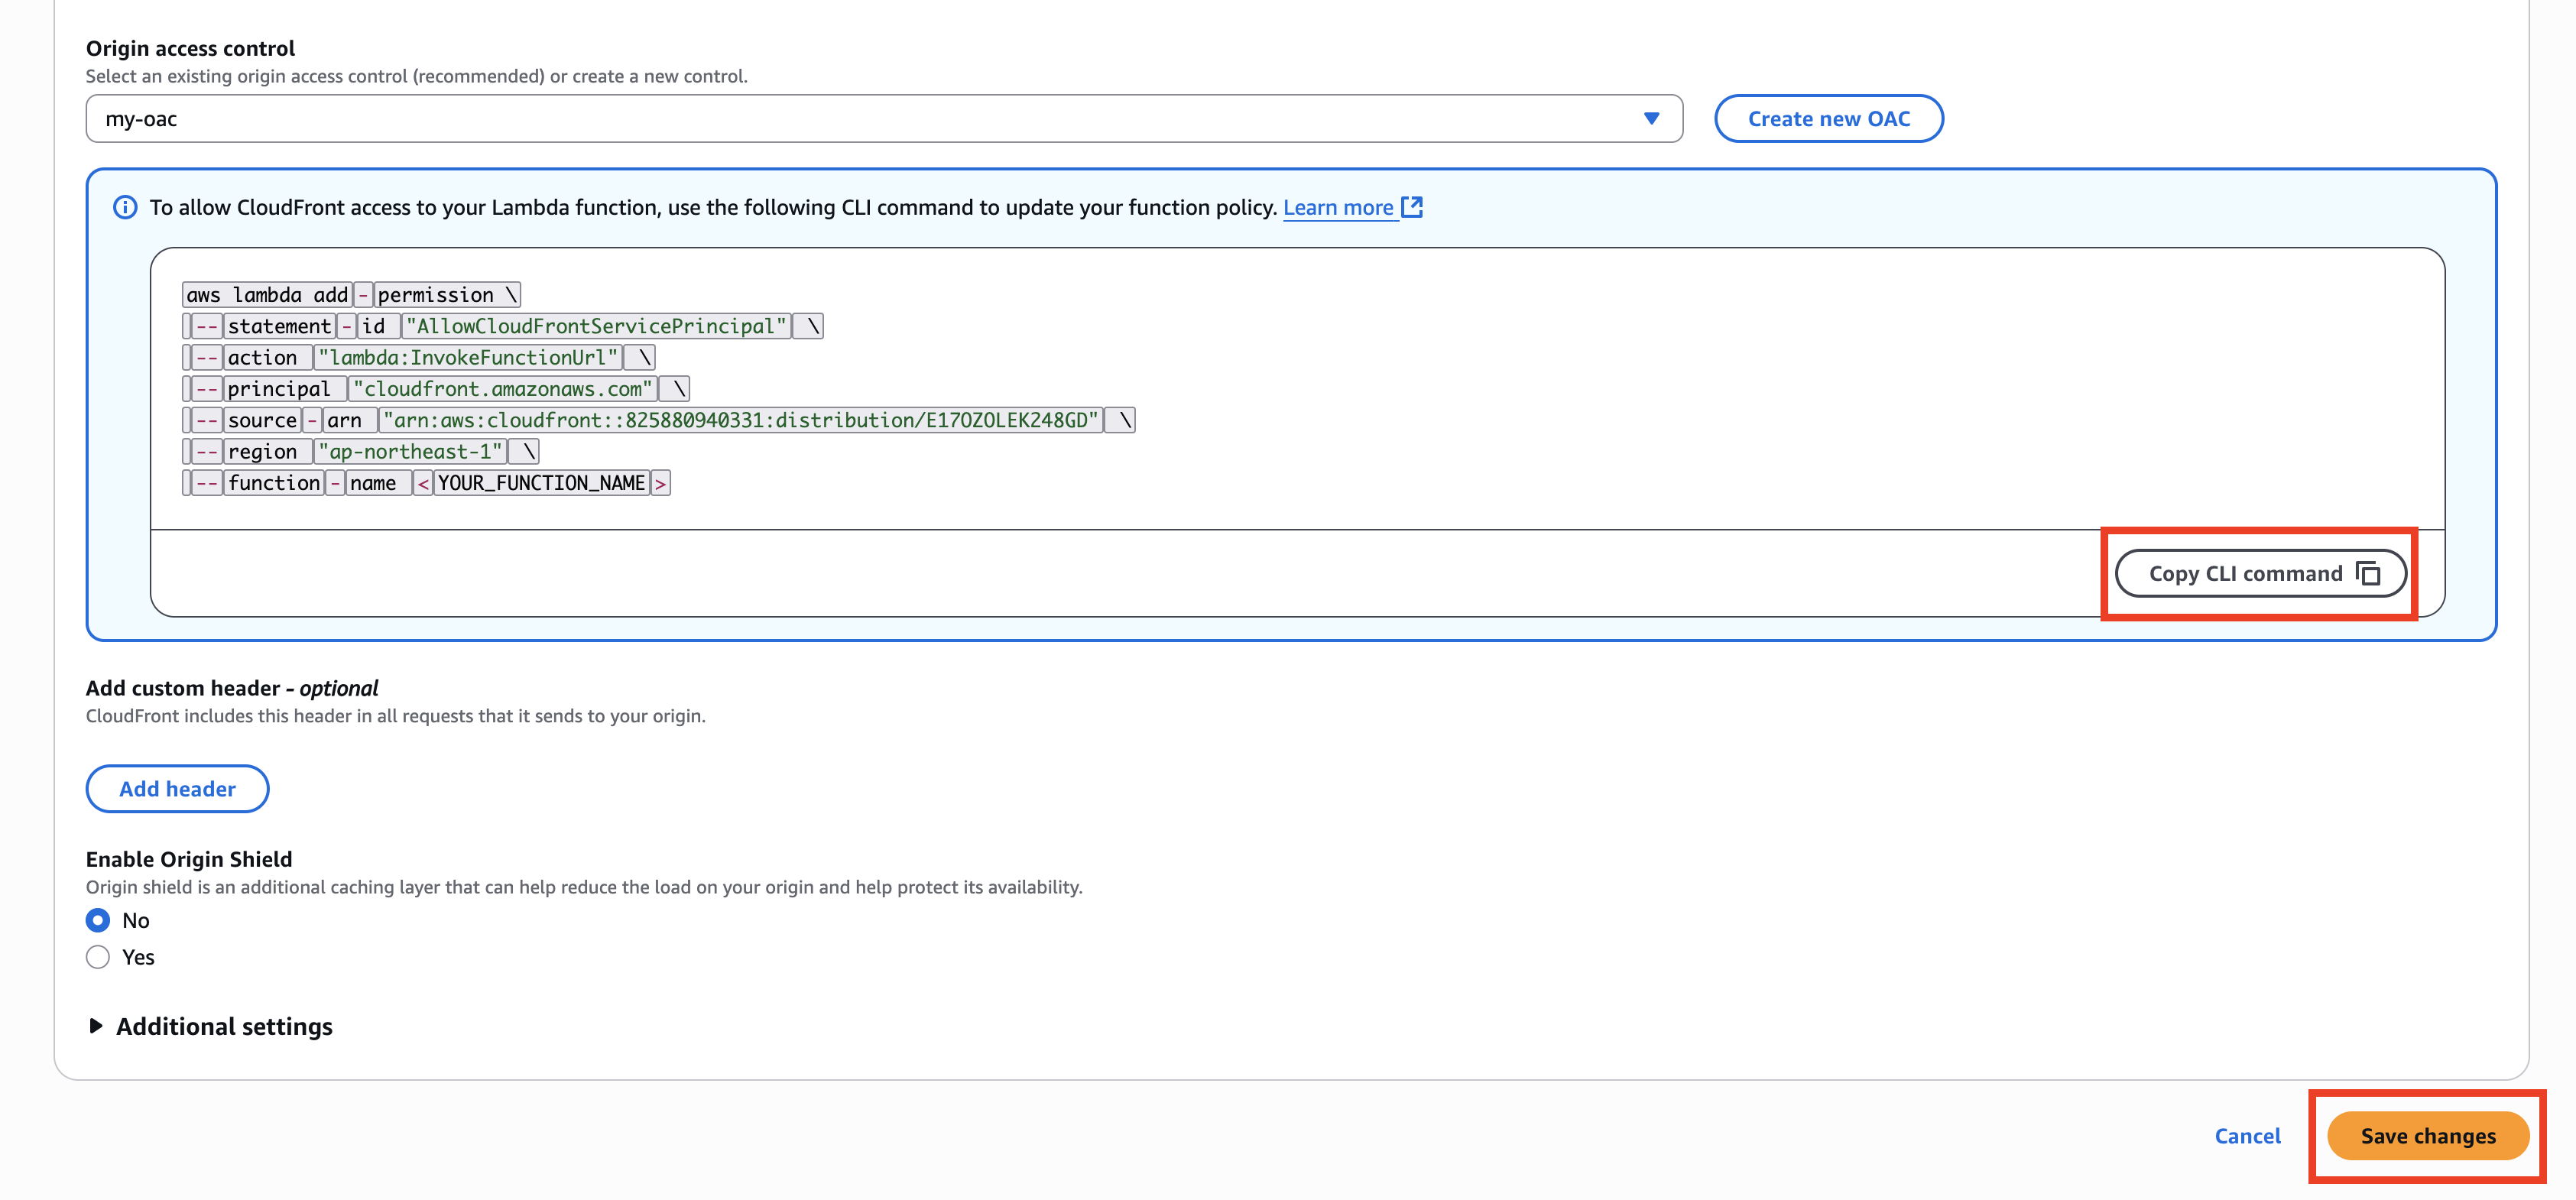
Replace <YOUR_FUNCTION_NAME> with the name of the Lambda function to which the container image has been applied, and then run the CLI command.
aws lambda add-permission \
--statement-id "AllowCloudFrontServicePrincipal" \
--action "lambda:InvokeFunctionUrl" \
--principal "cloudfront.amazonaws.com" \
--source-arn "arn:aws:cloudfront::000011112222:distribution/E1234ABC5D0EFG" \
--region "us-east-1" \
--function-name <YOUR_FUNCTION_NAME>
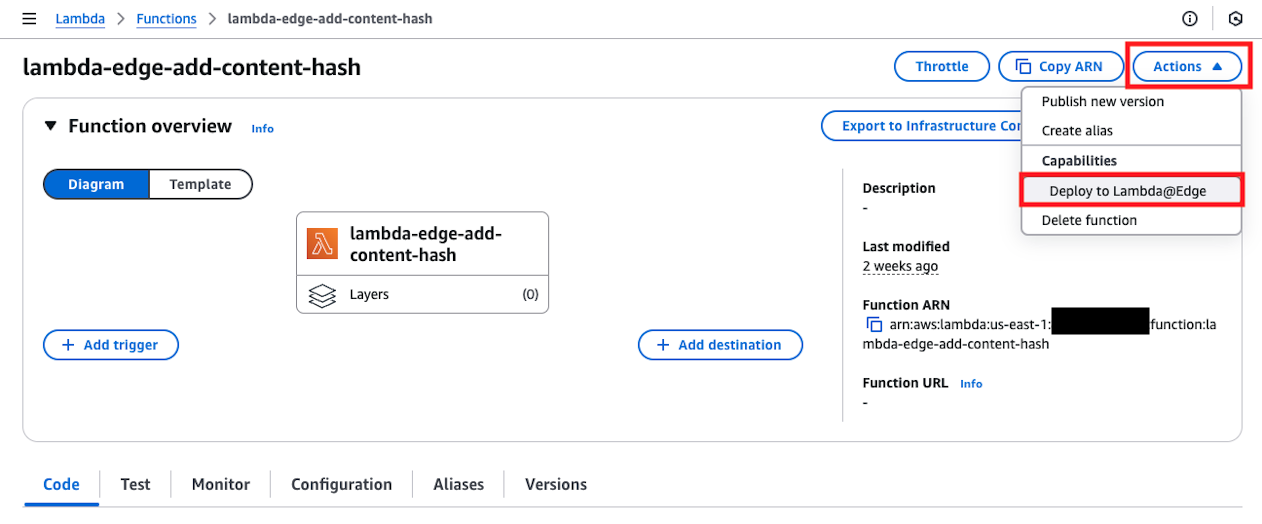
As the final step, to resolve IAM authentication when accessing Lambda Function URL, enable Lambda@Edge that adds Content Hash. Open the function you created for Lambda@Edge in us-east-1 and deploy to Lambda@Edge from the Actions button in the upper right.
In the displayed dialog, enter as follows and press the deploy button.
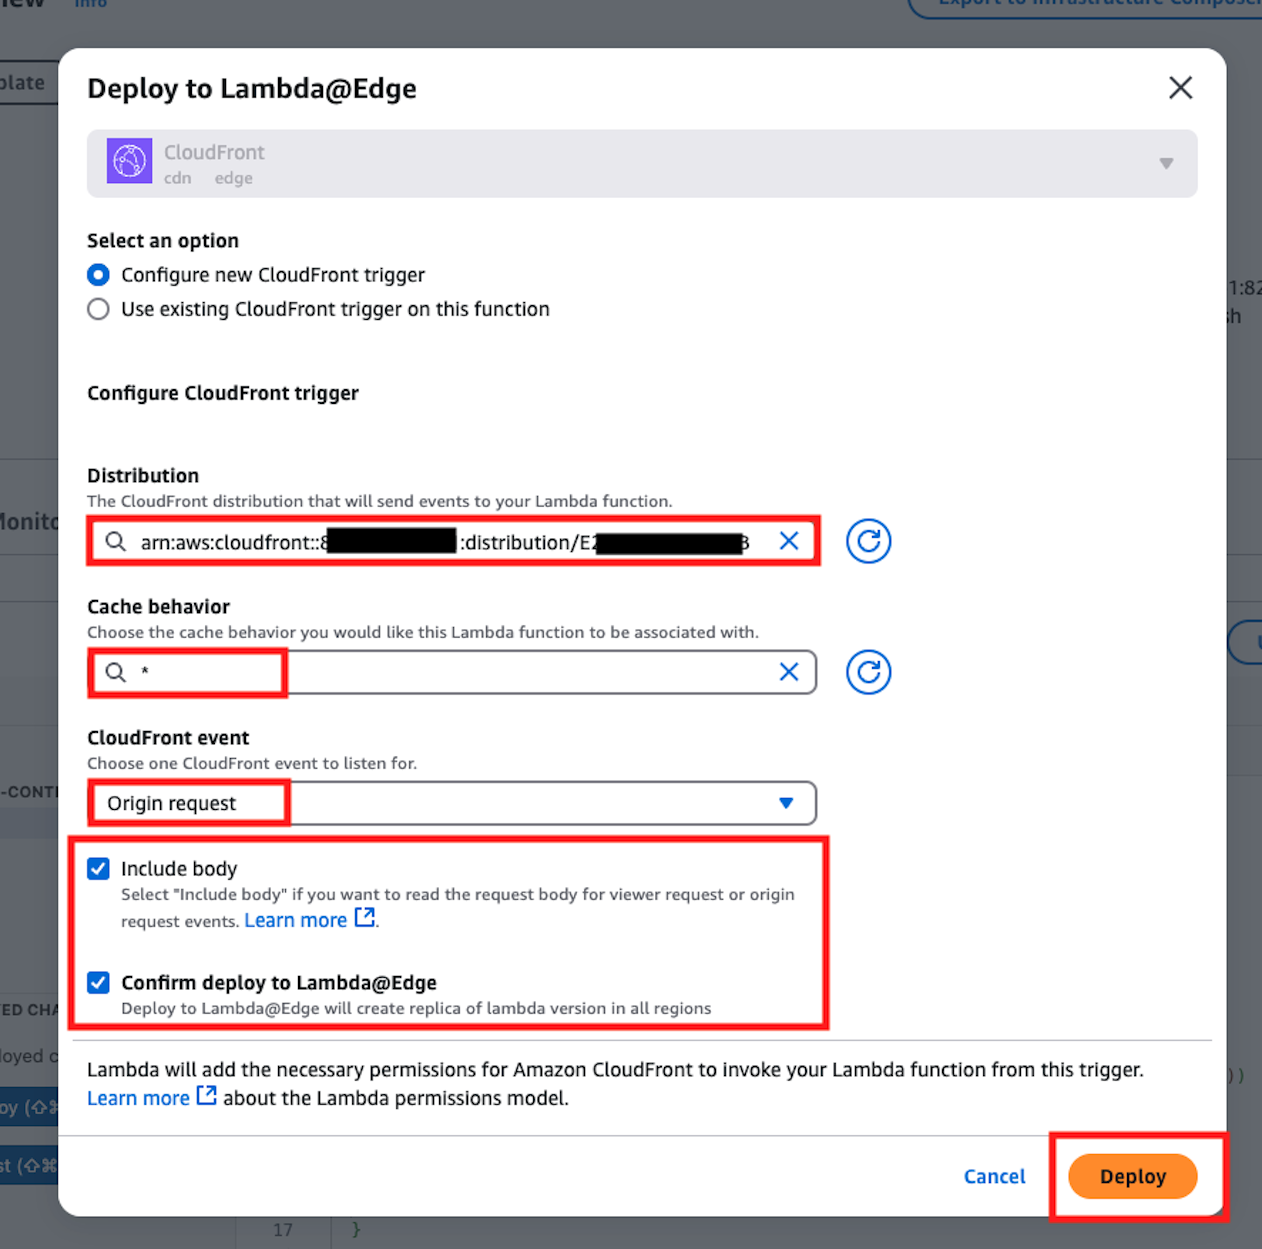
This completes all the configuration.
Perform Operation Verification
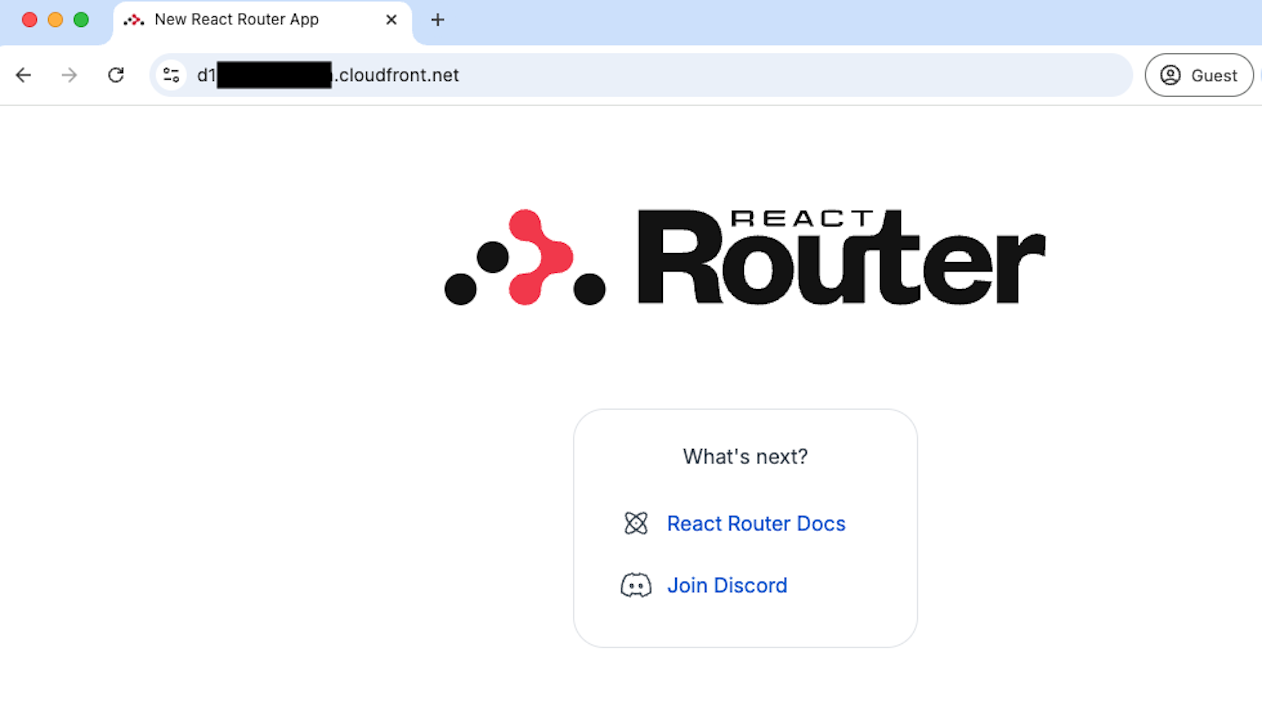
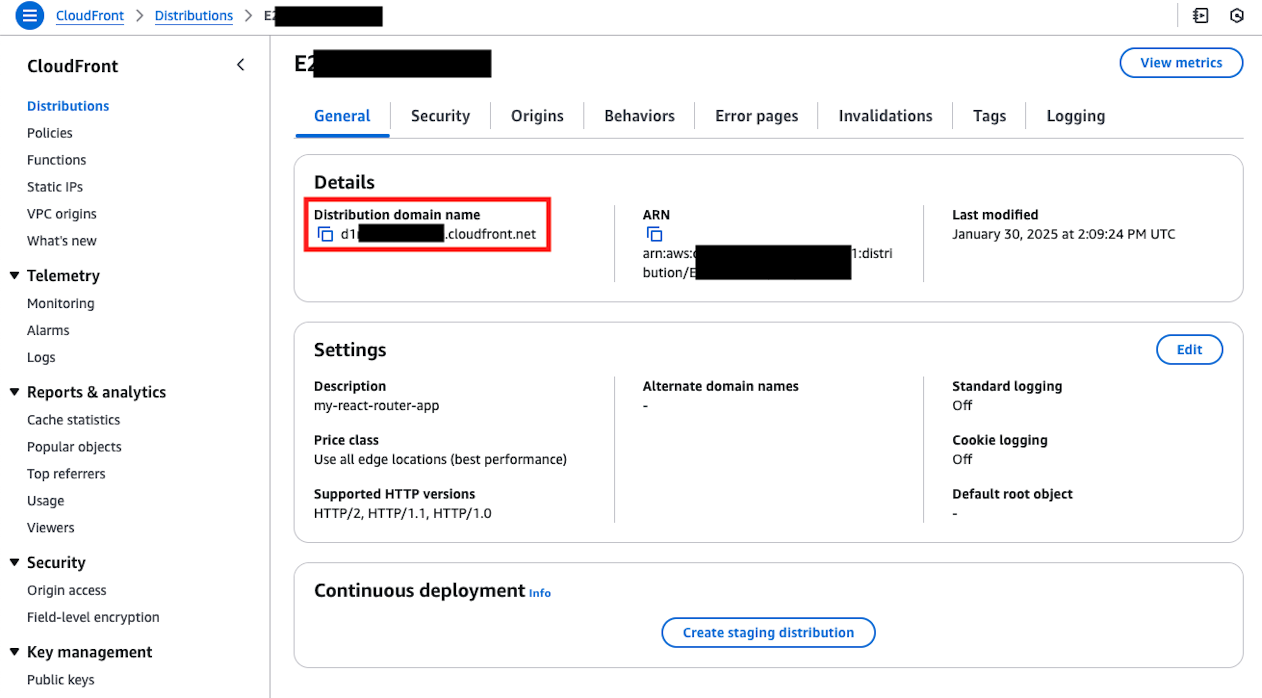
Once you've configured everything up to this point, CloudFront deployment will occur in a few minutes. After confirming the completion display, open the domain issued by CloudFront.
If displayed as follows, it's complete. From here on, operations can be performed by simply pushing AWS Lambda container images and updating Lambda as release work.