How to Verify Deployed Sample Application Operation
This document explains how to verify the operation of reference implementation applications deployed with AWS CloudFormation.
Initial Setup for DB Deployed on AWS
The deployed VPC has a bastion server with SSM agent pre-installed and VPC endpoints deployed. Using these mechanisms, you can port forward between the DB in the private subnet and your local PC, making it possible to connect directly from your local PC to the DB on AWS for initial setup.
Create a session for port forwarding with the following command.
[Local PC ~]aws ssm start-session \
  --target i-0287714efd175070c \ # Bastion Instance ID
  --document-name AWS-StartPortForwardingSessionToRemoteHost \
  --region us-east-1 \
  --profile <your AWS profile> \ # An instance profile with a policy that allows Systems Manager (SSM) actions is required.
  --parameters '{"host":["db-postgresql-exljay17xqym.cluster-caextc42ljwl.us-east-1.rds.amazonaws.com"],"portNumber":["5432"],"localPortNumber":["5432"]}' # Writer instance endpoint of the DB stack deployed earlier
Download and install pgAdmin on your local PC for DB operations from local environment. Follow the steps below to create databases and tables that the application will reference using pgAdmin.
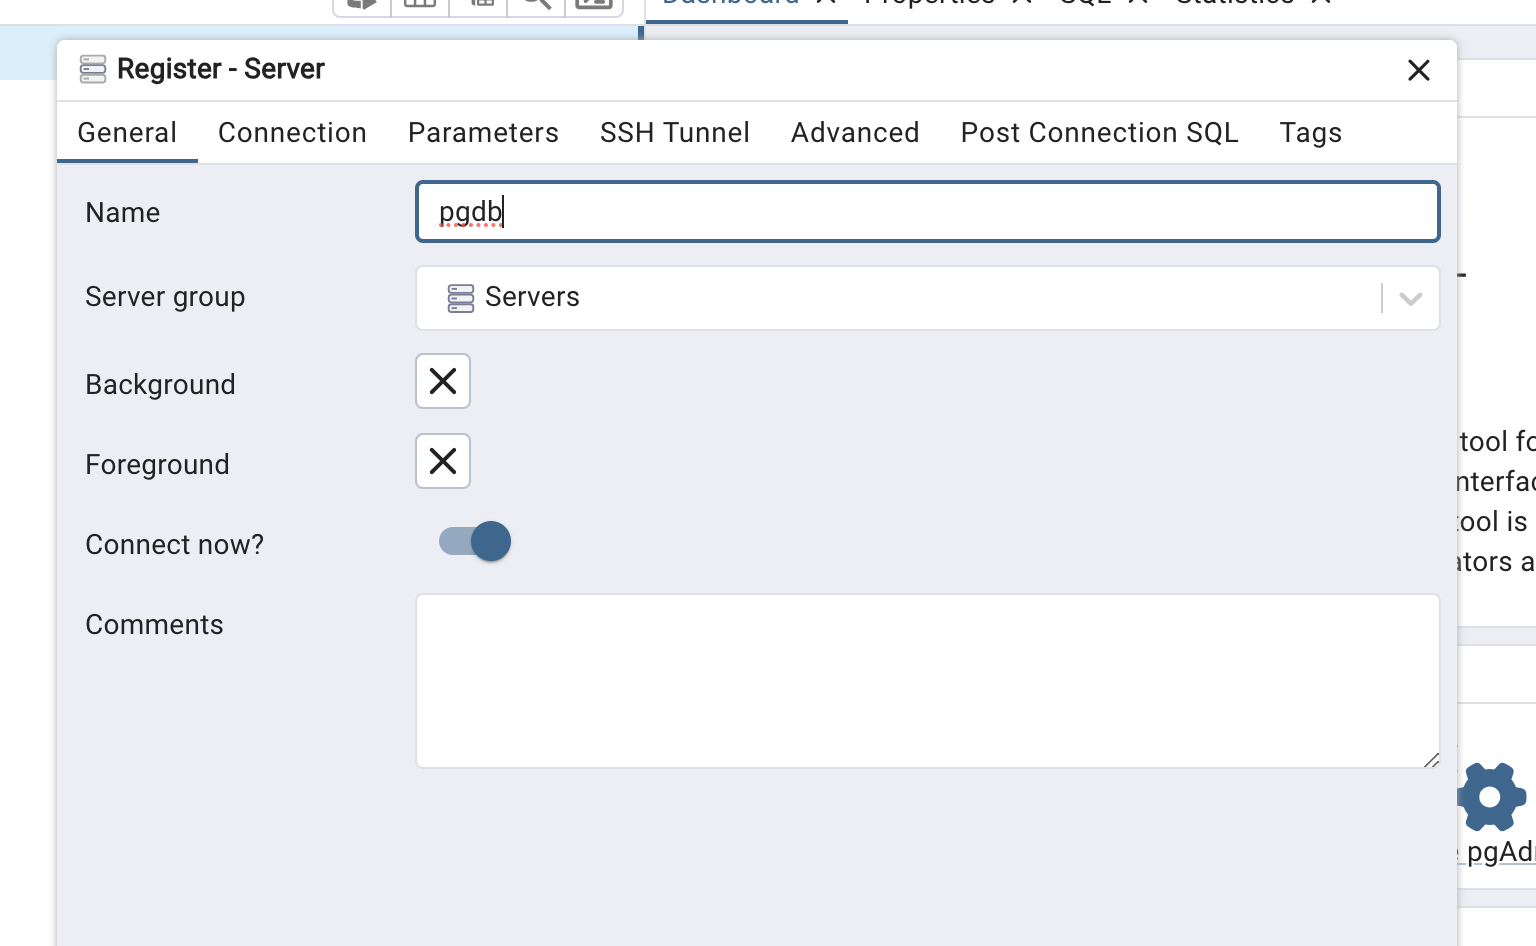
1. Server Registration

2. Enter Server Name
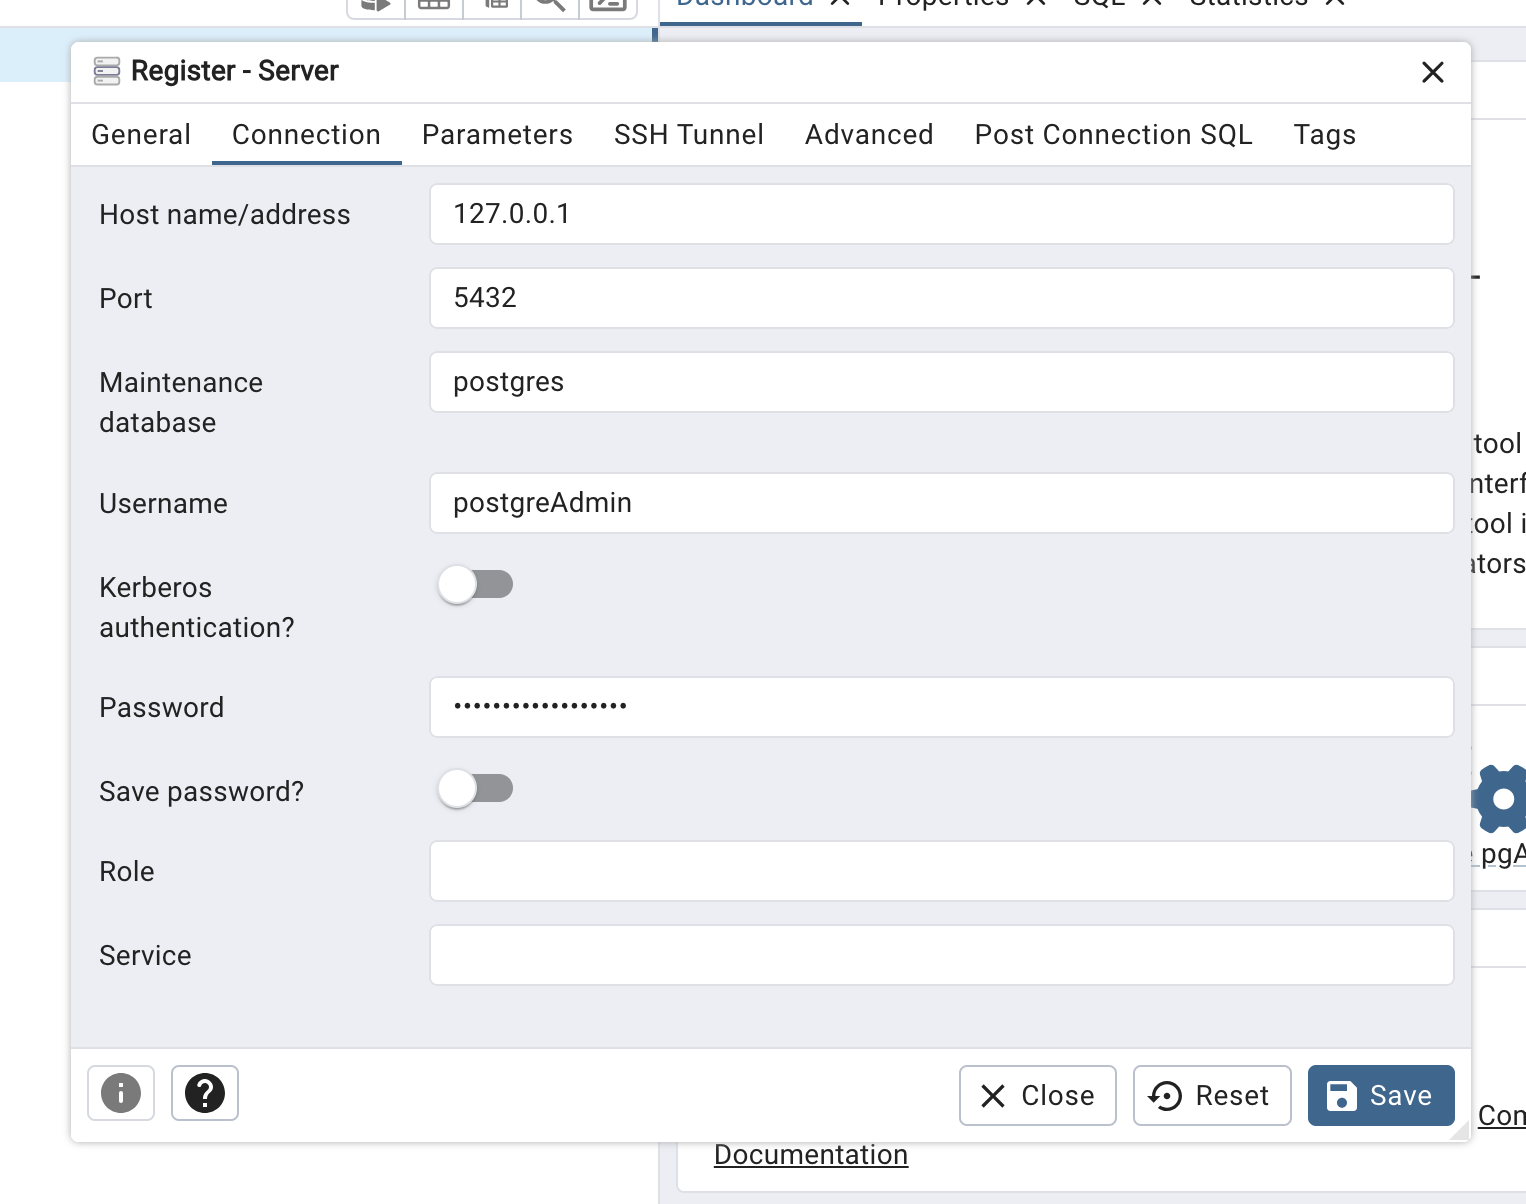
3. Host Configuration
Since we are using port forwarding, enter 127.0.0.1 or localhost for Host. Enter the Username and Password you specified during AWS CloudFormation deployment. The Maintenance database can remain as postgres which is already entered.
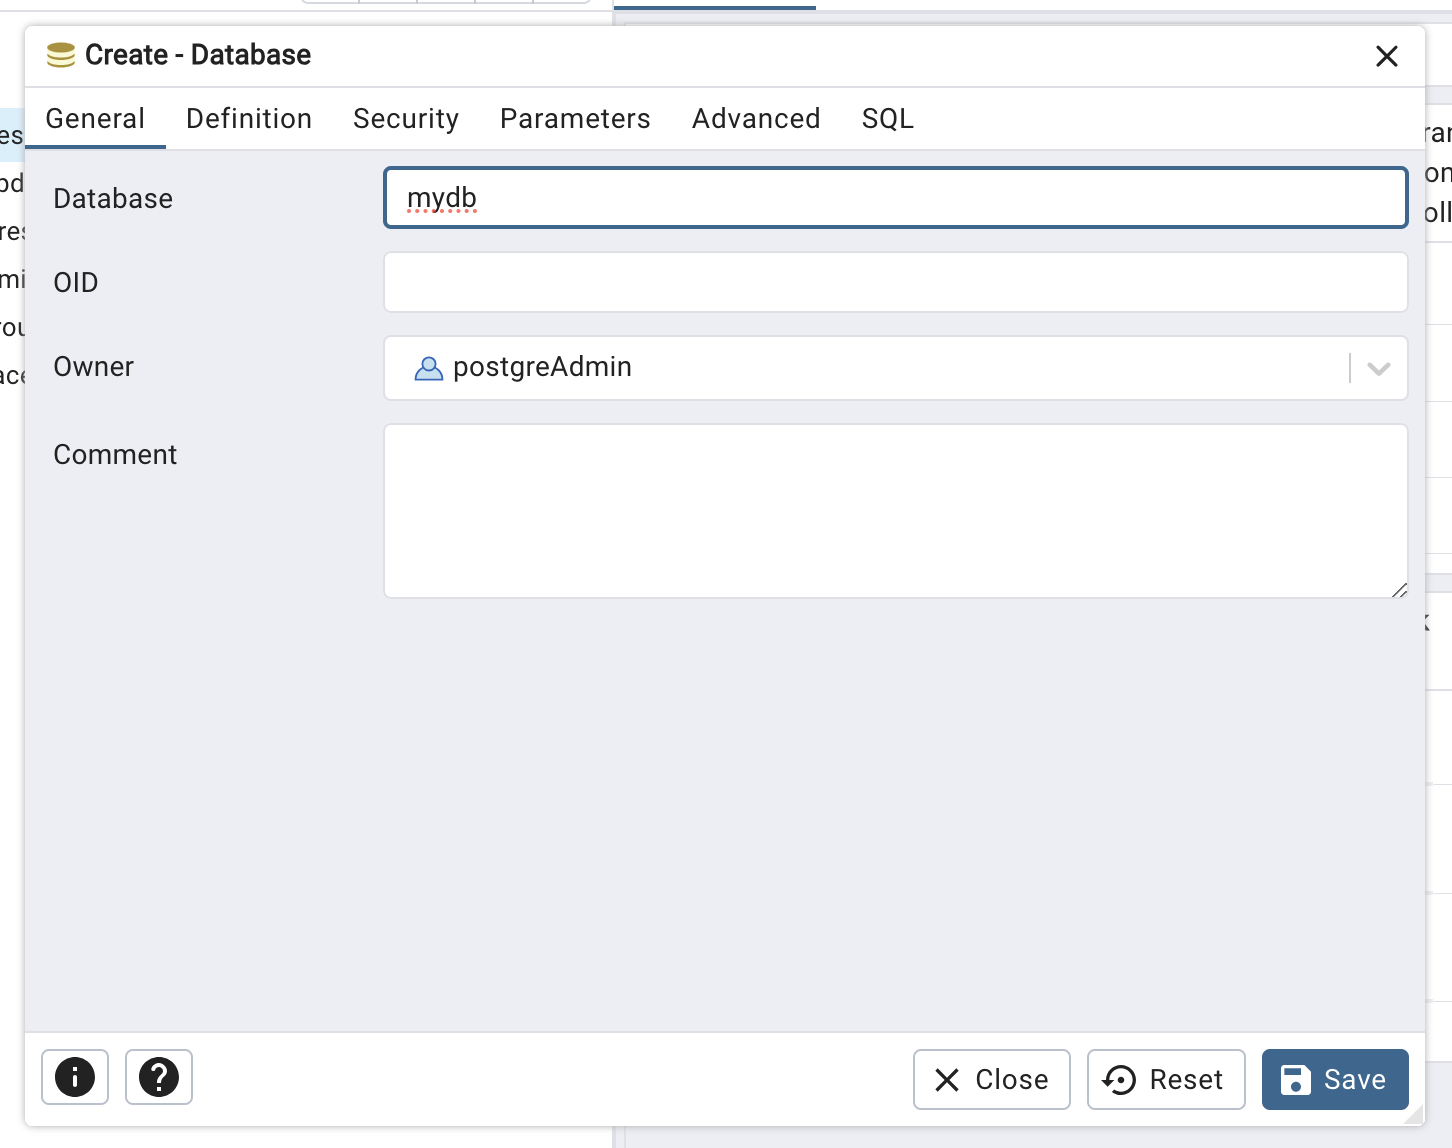
4. Create Database
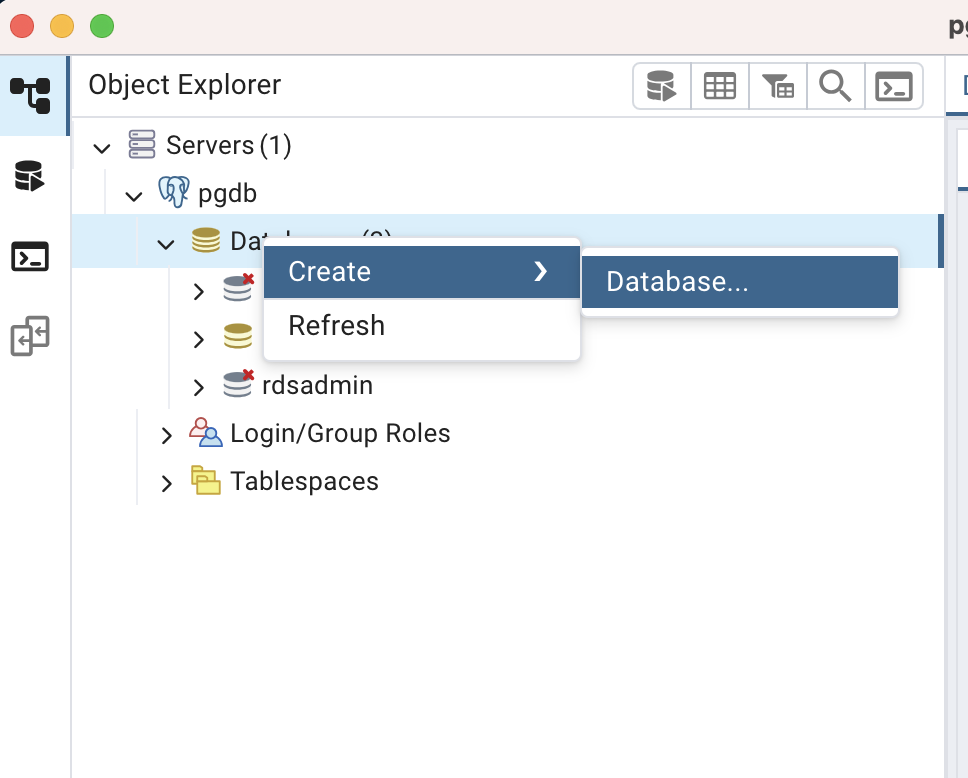
5. Enter Database Name
You can enter any name you prefer for the Database. In this example, we enter mydb and click Save to create the Database.
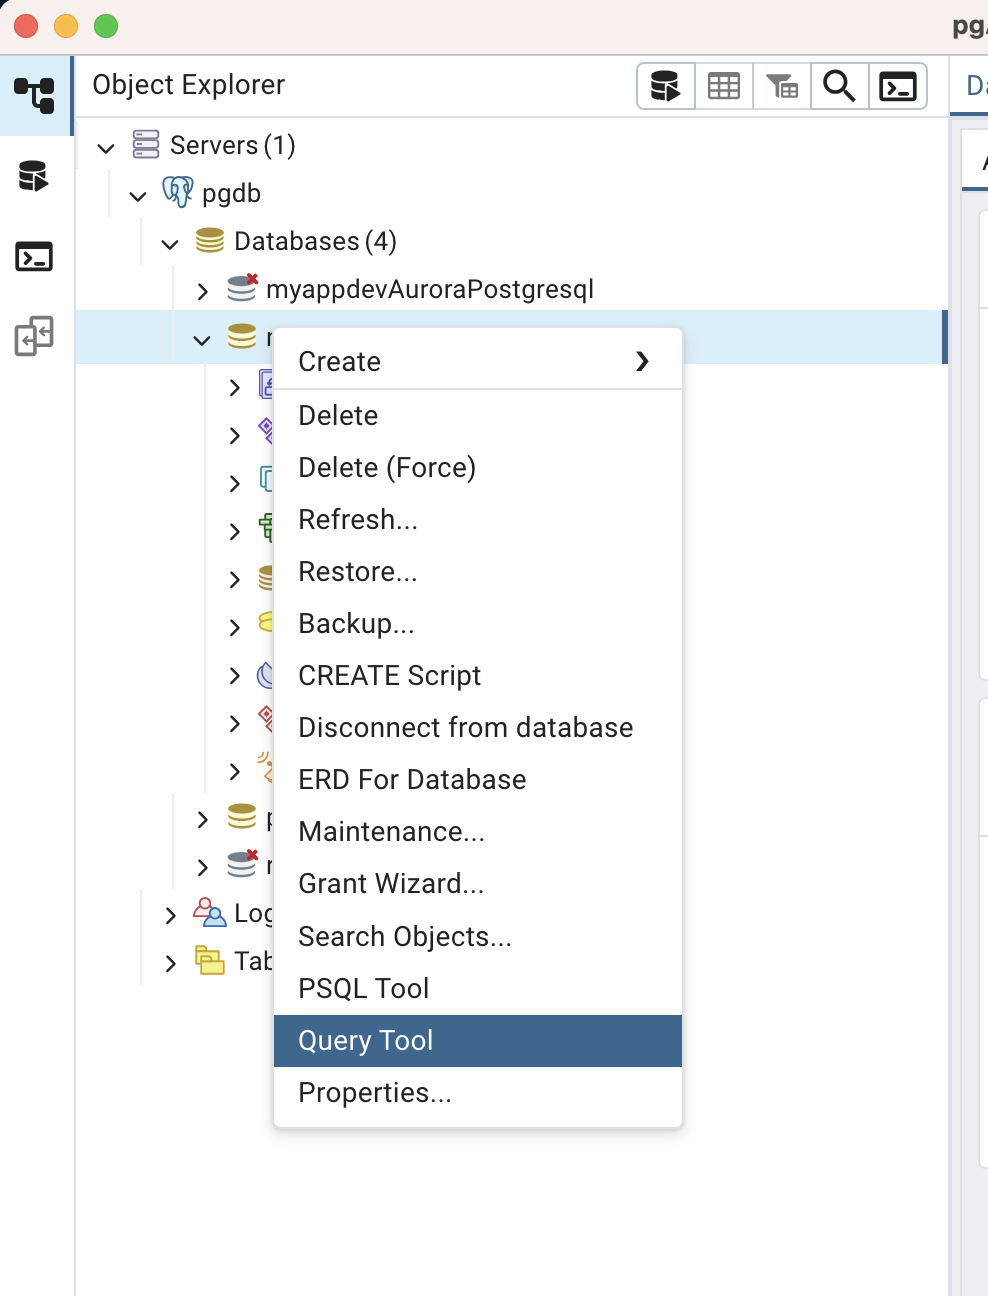
6. Create Table
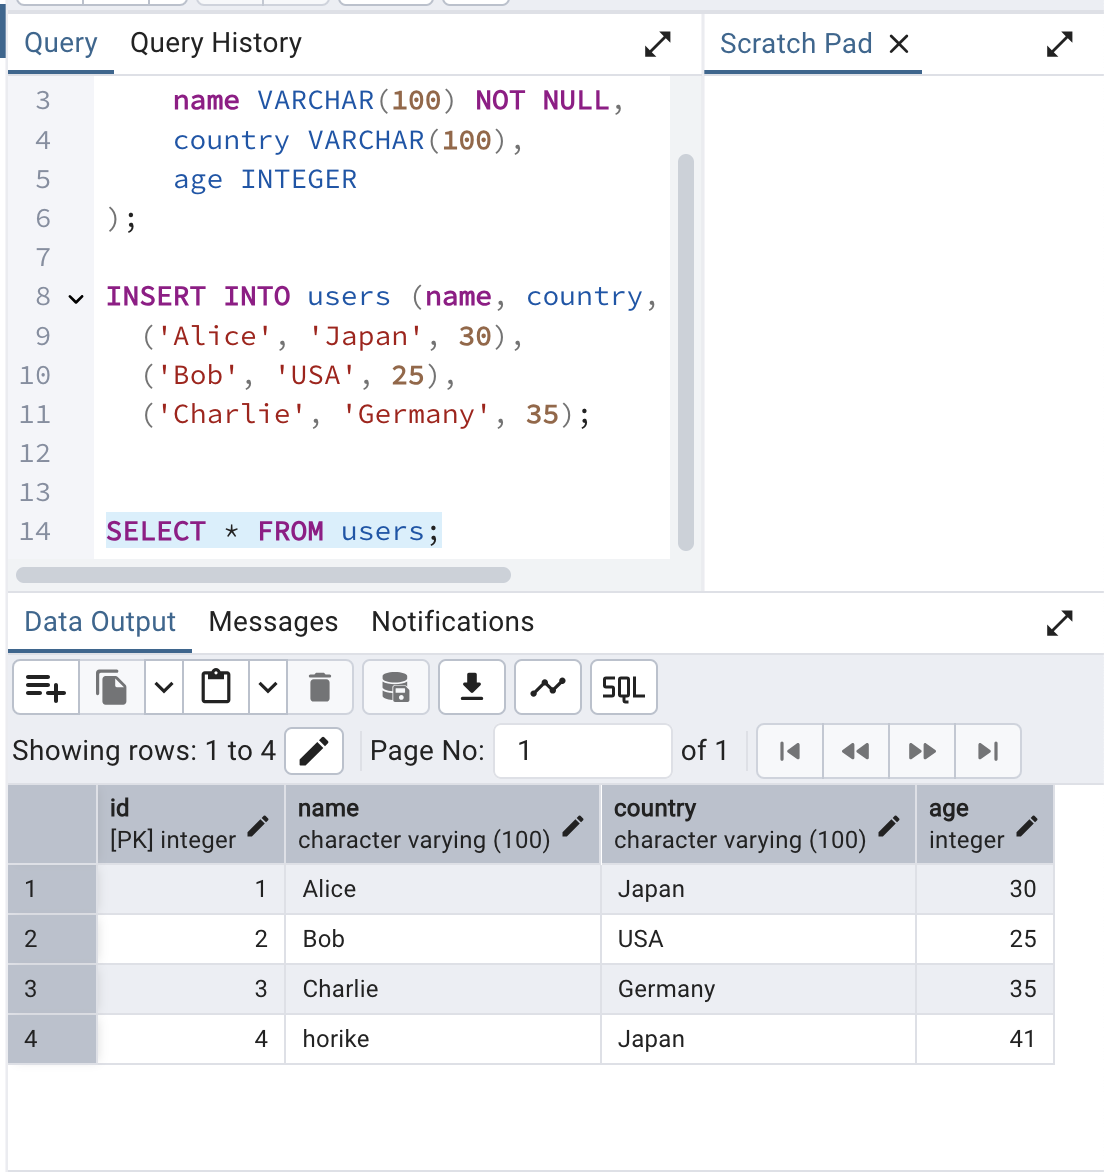
Select the created mydb and open Query Tool. From there, create the table that will be used by the sample application.
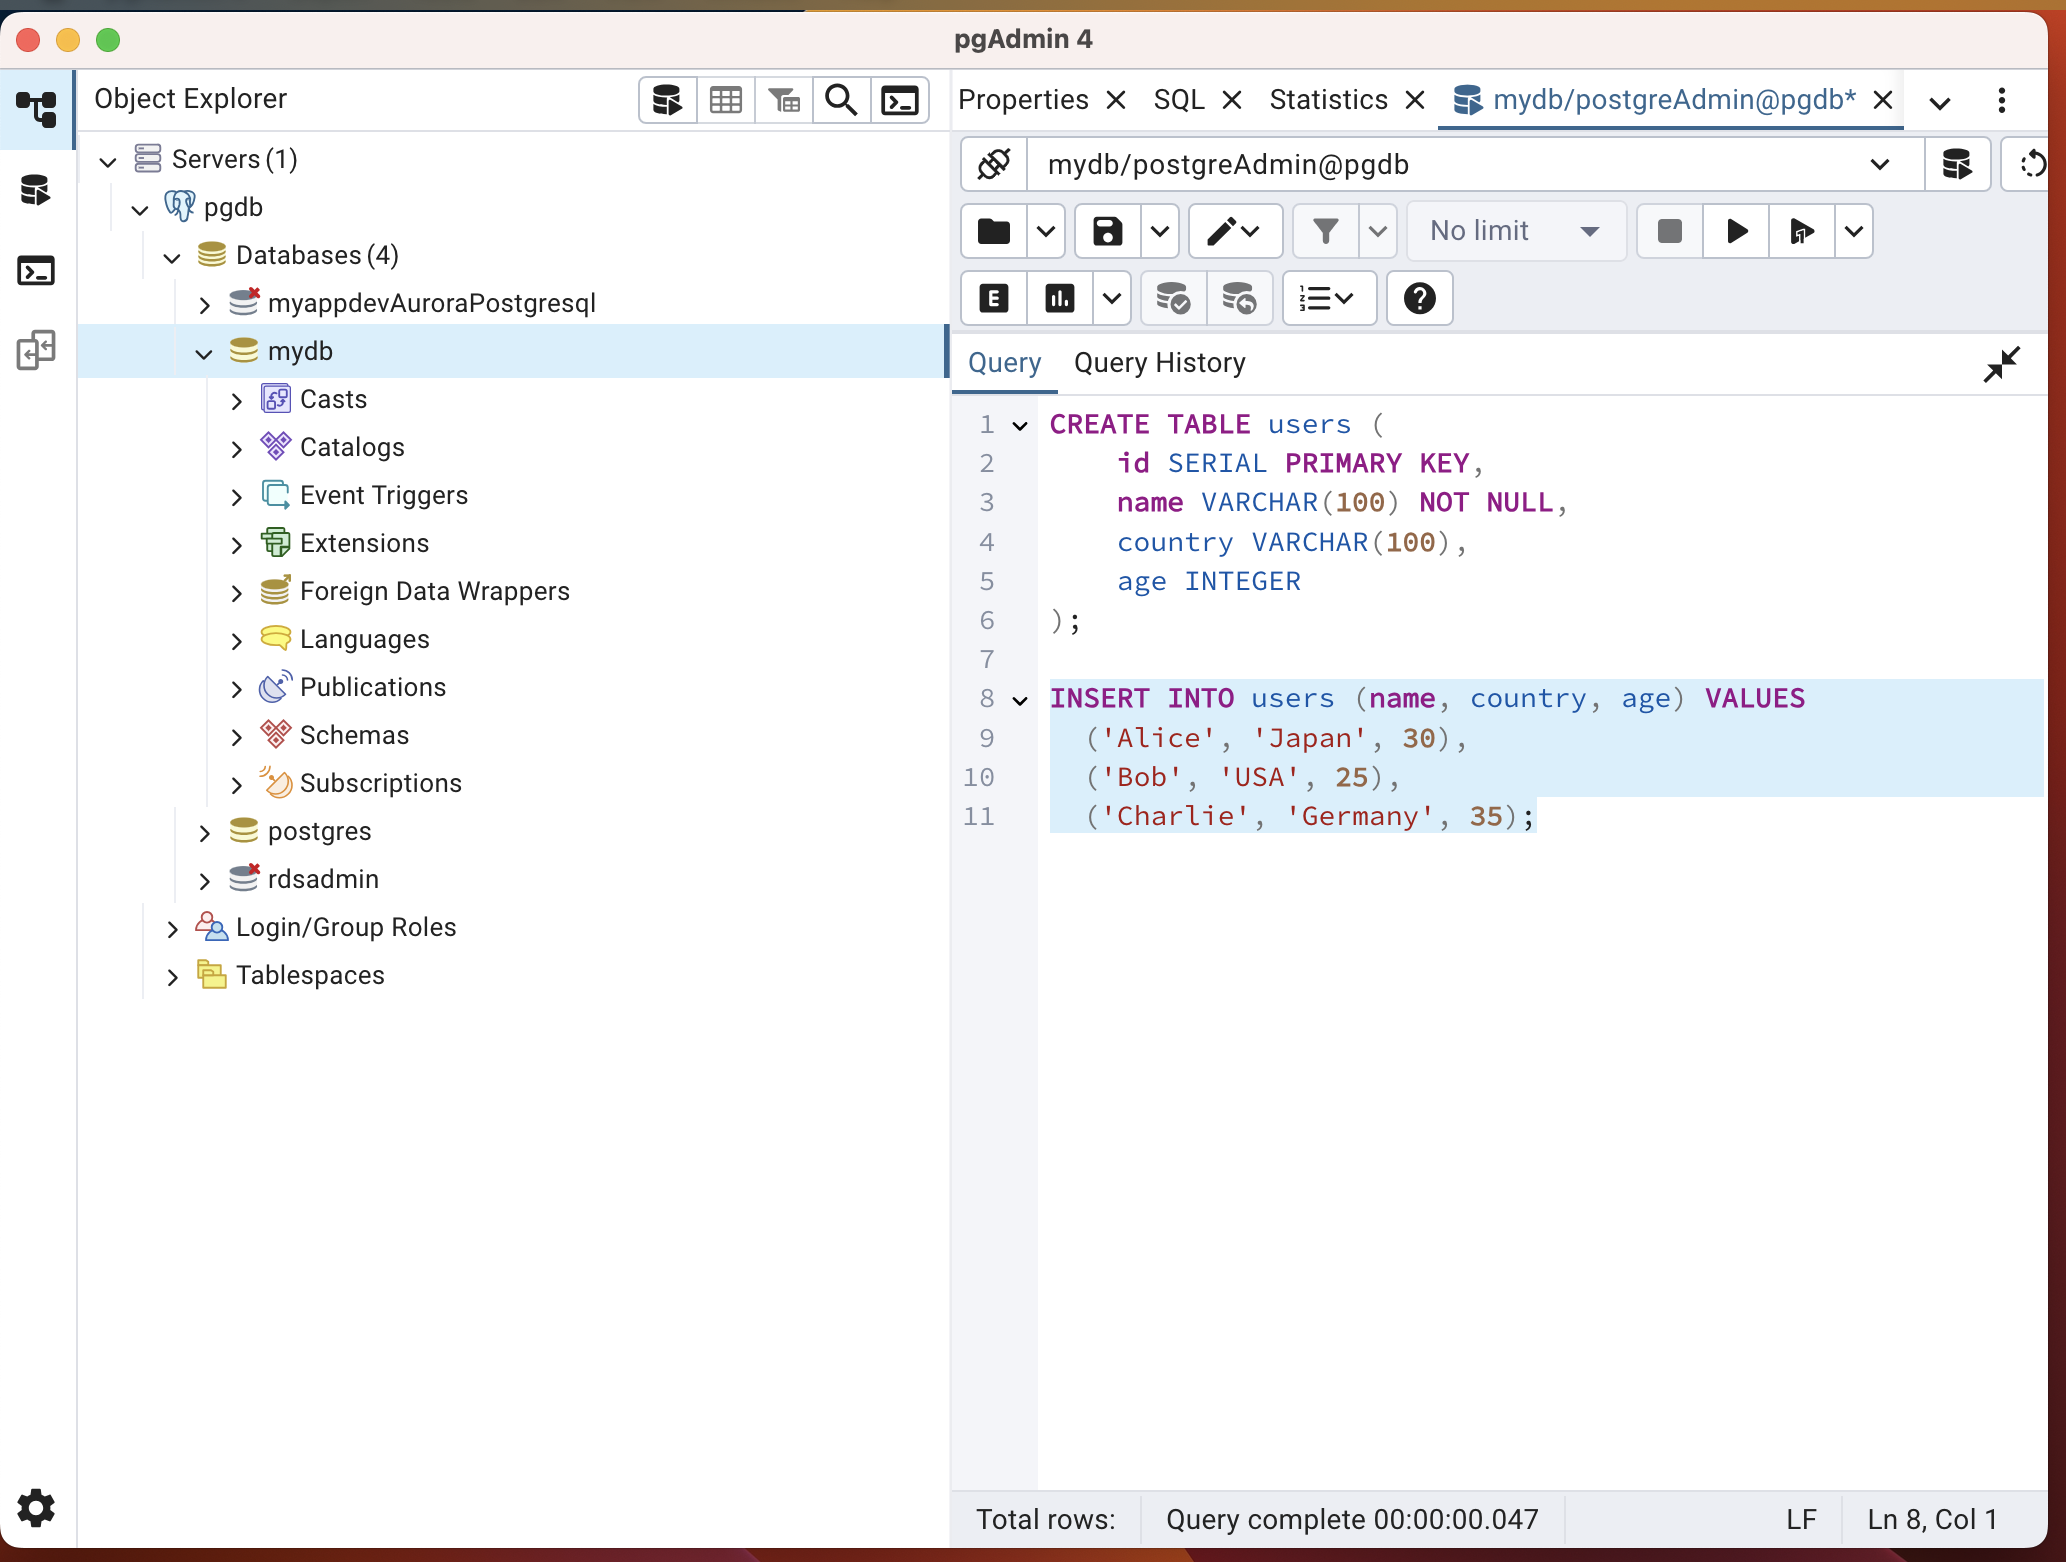
7. Create Test Data
Execute Create Table and insert from Query to create dummy data.
CREATE TABLE users (
id SERIAL PRIMARY KEY,
name VARCHAR(100) NOT NULL,
country VARCHAR(100),
age INTEGER
);
INSERT INTO users (name, country, age) VALUES
('Alice', 'Japan', 30),
('Bob', 'USA', 25),
('Charlie', 'Germany', 35);
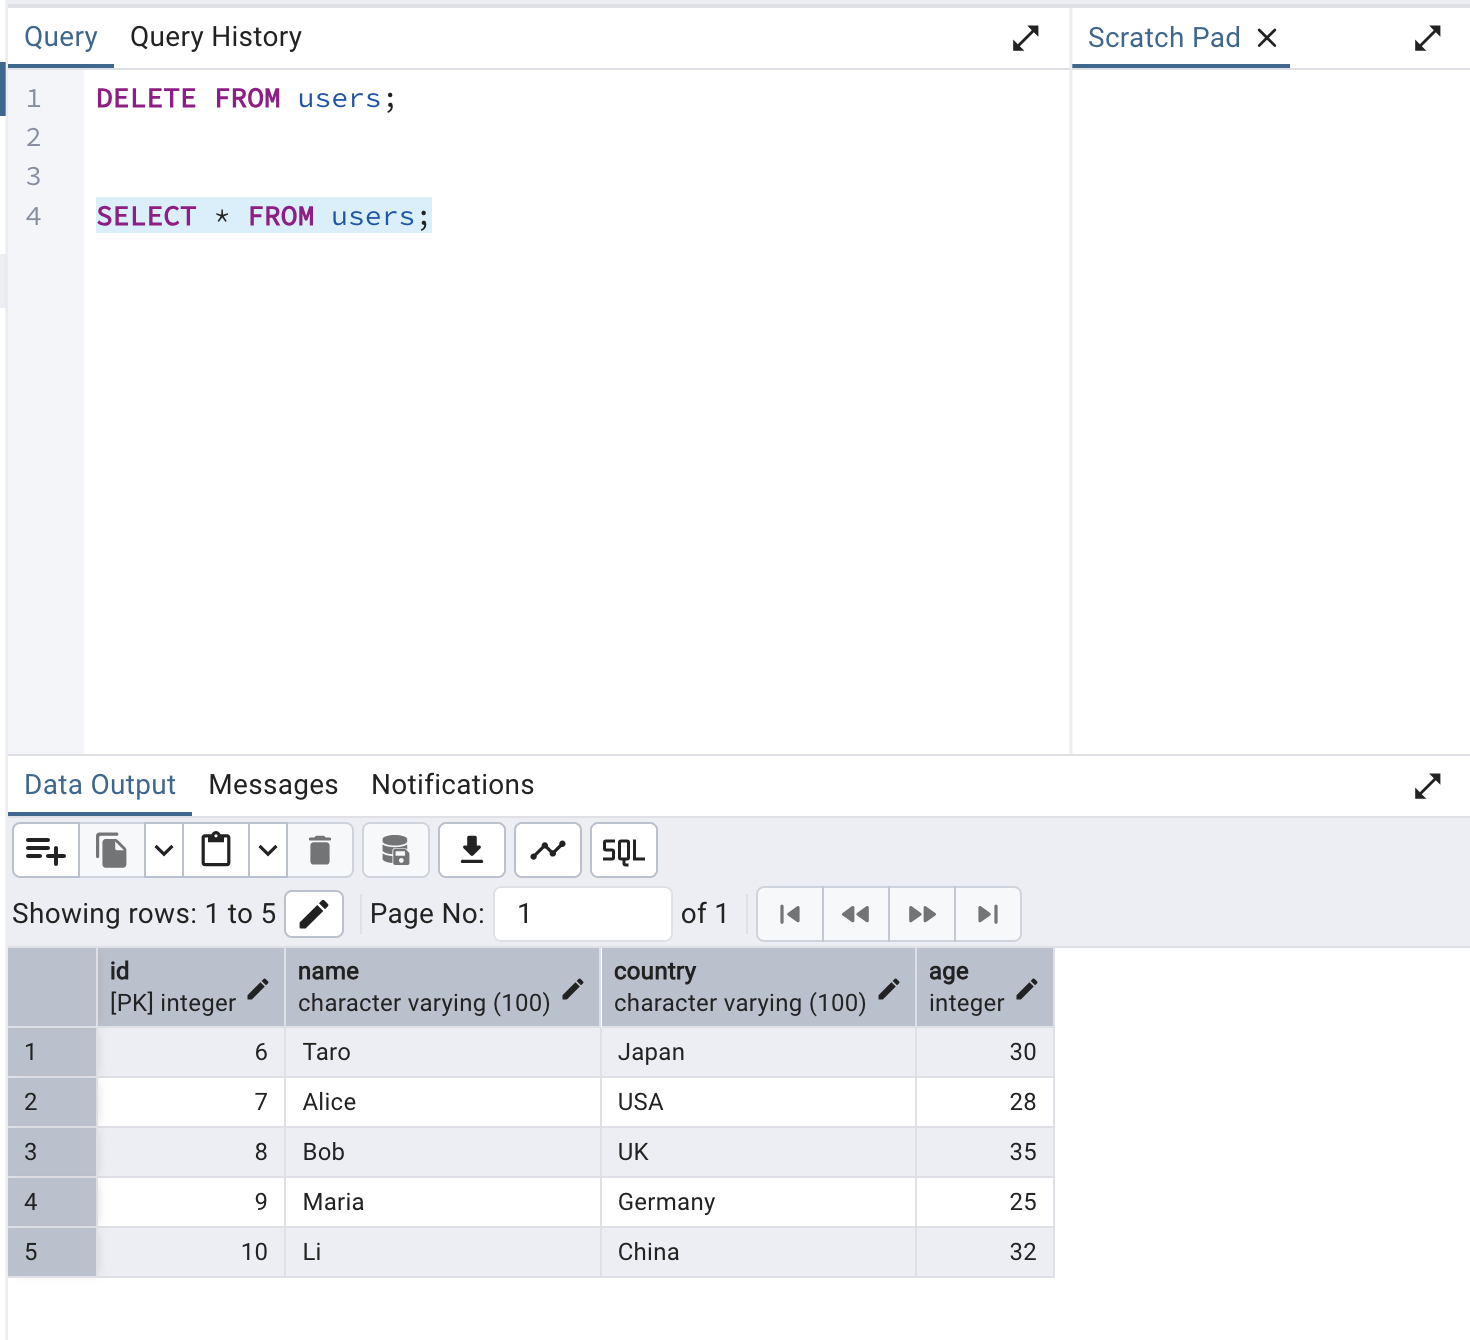
SELECT * FROM users;
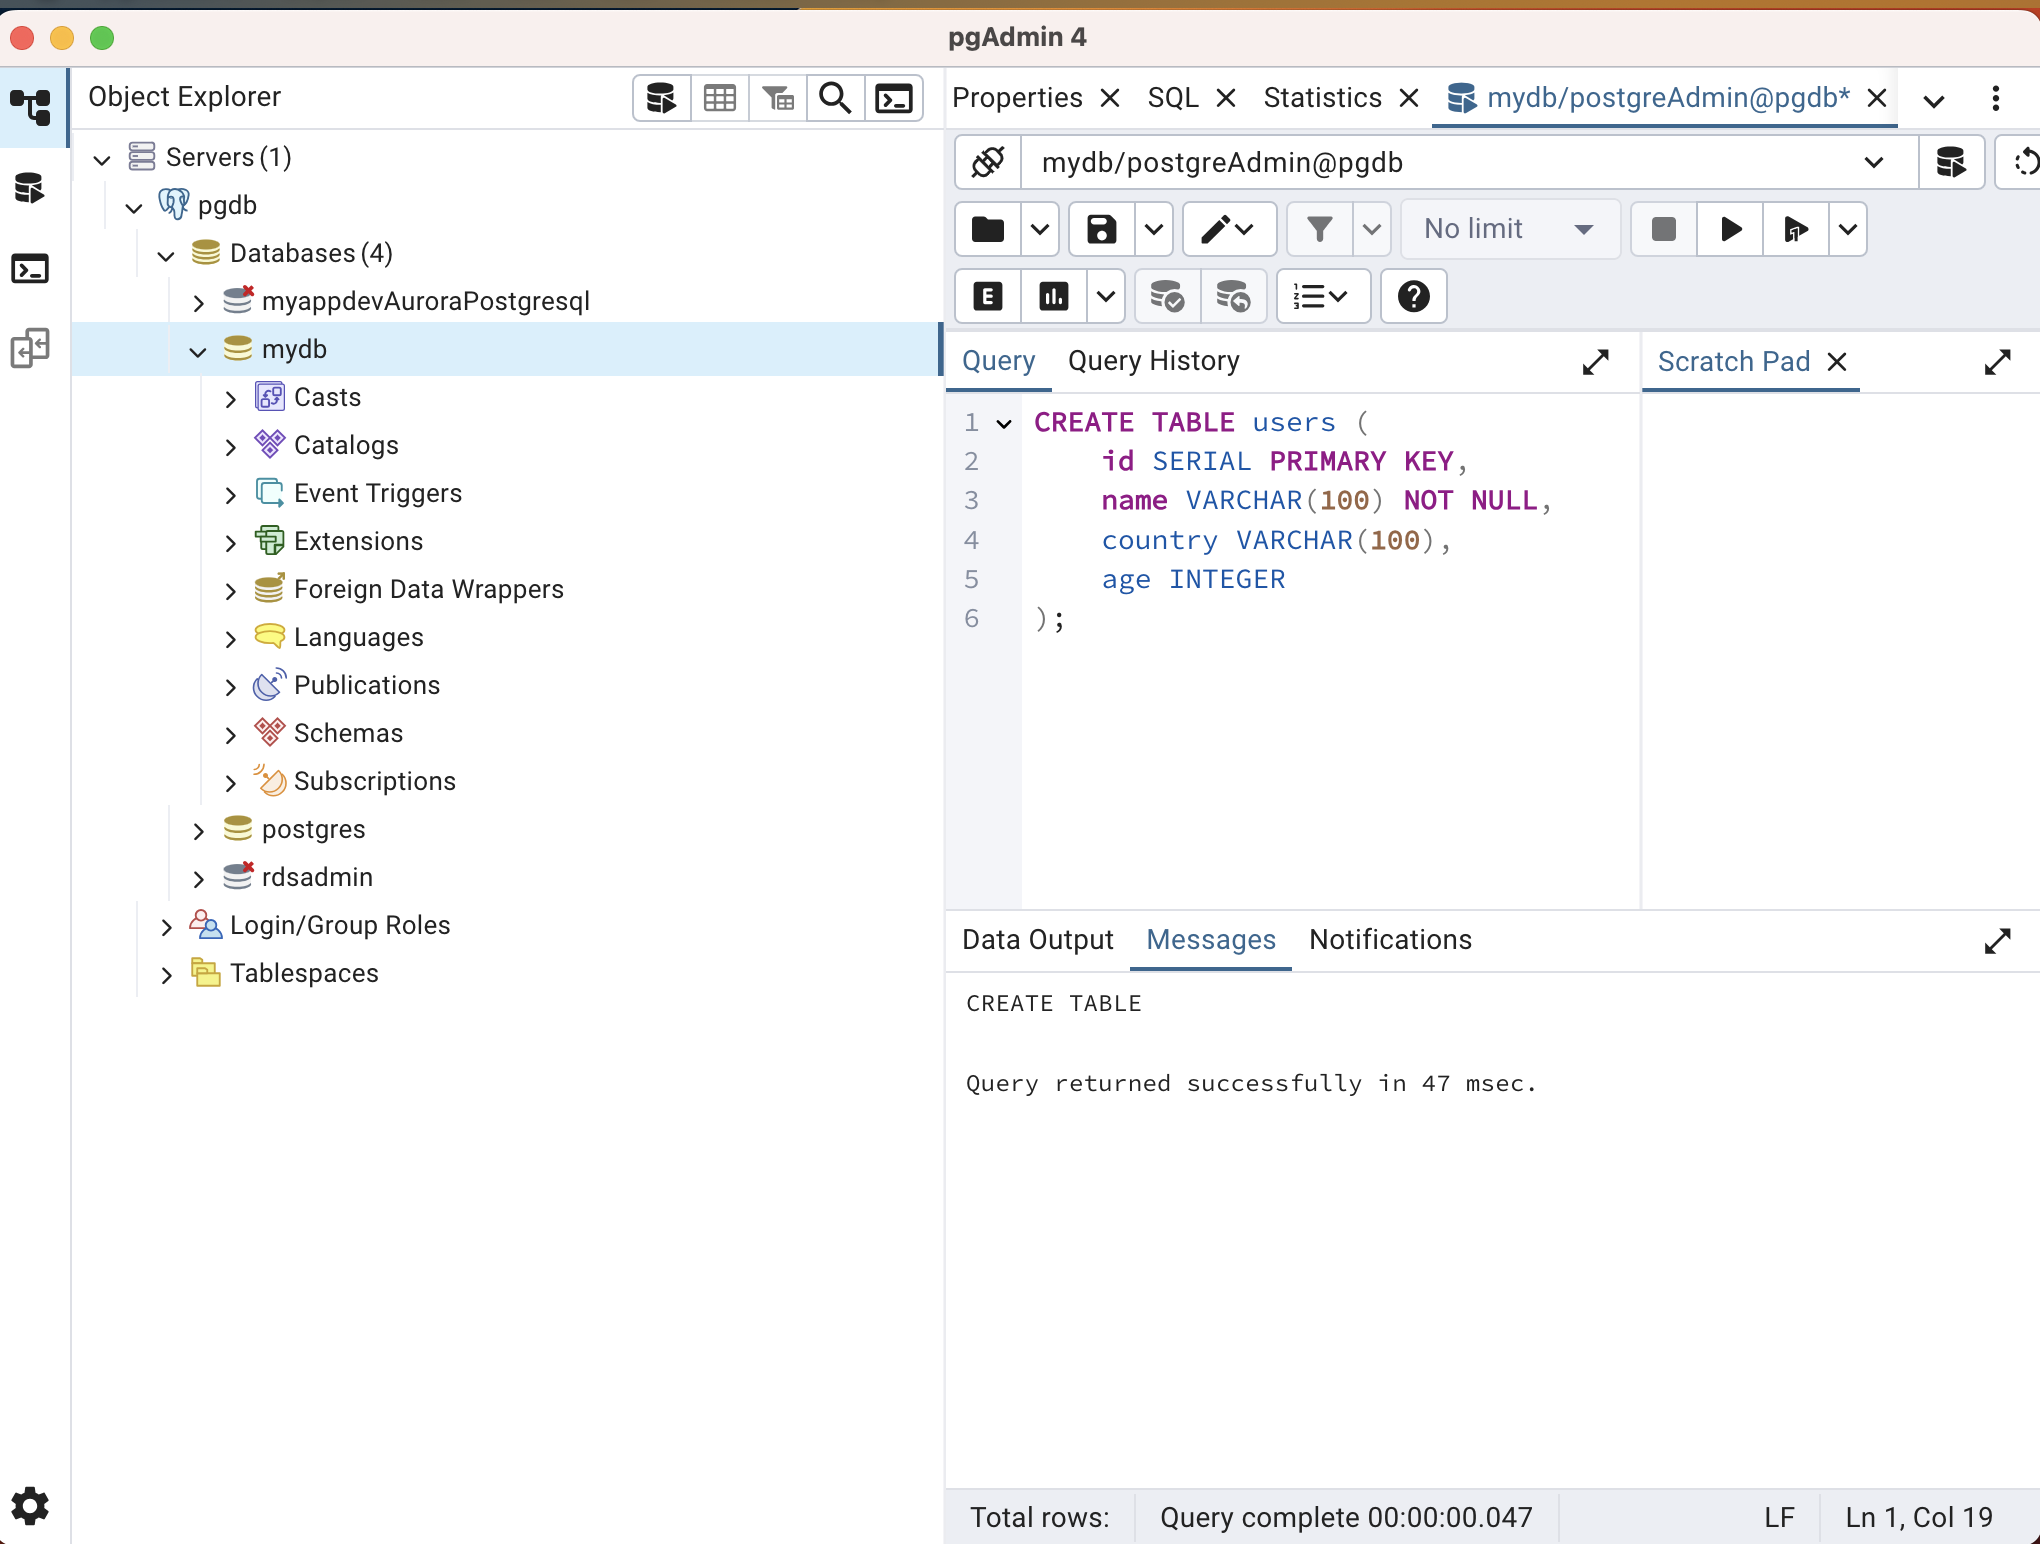
This completes the connection to DB from local environment and creation of Database and Table to be used by the application.
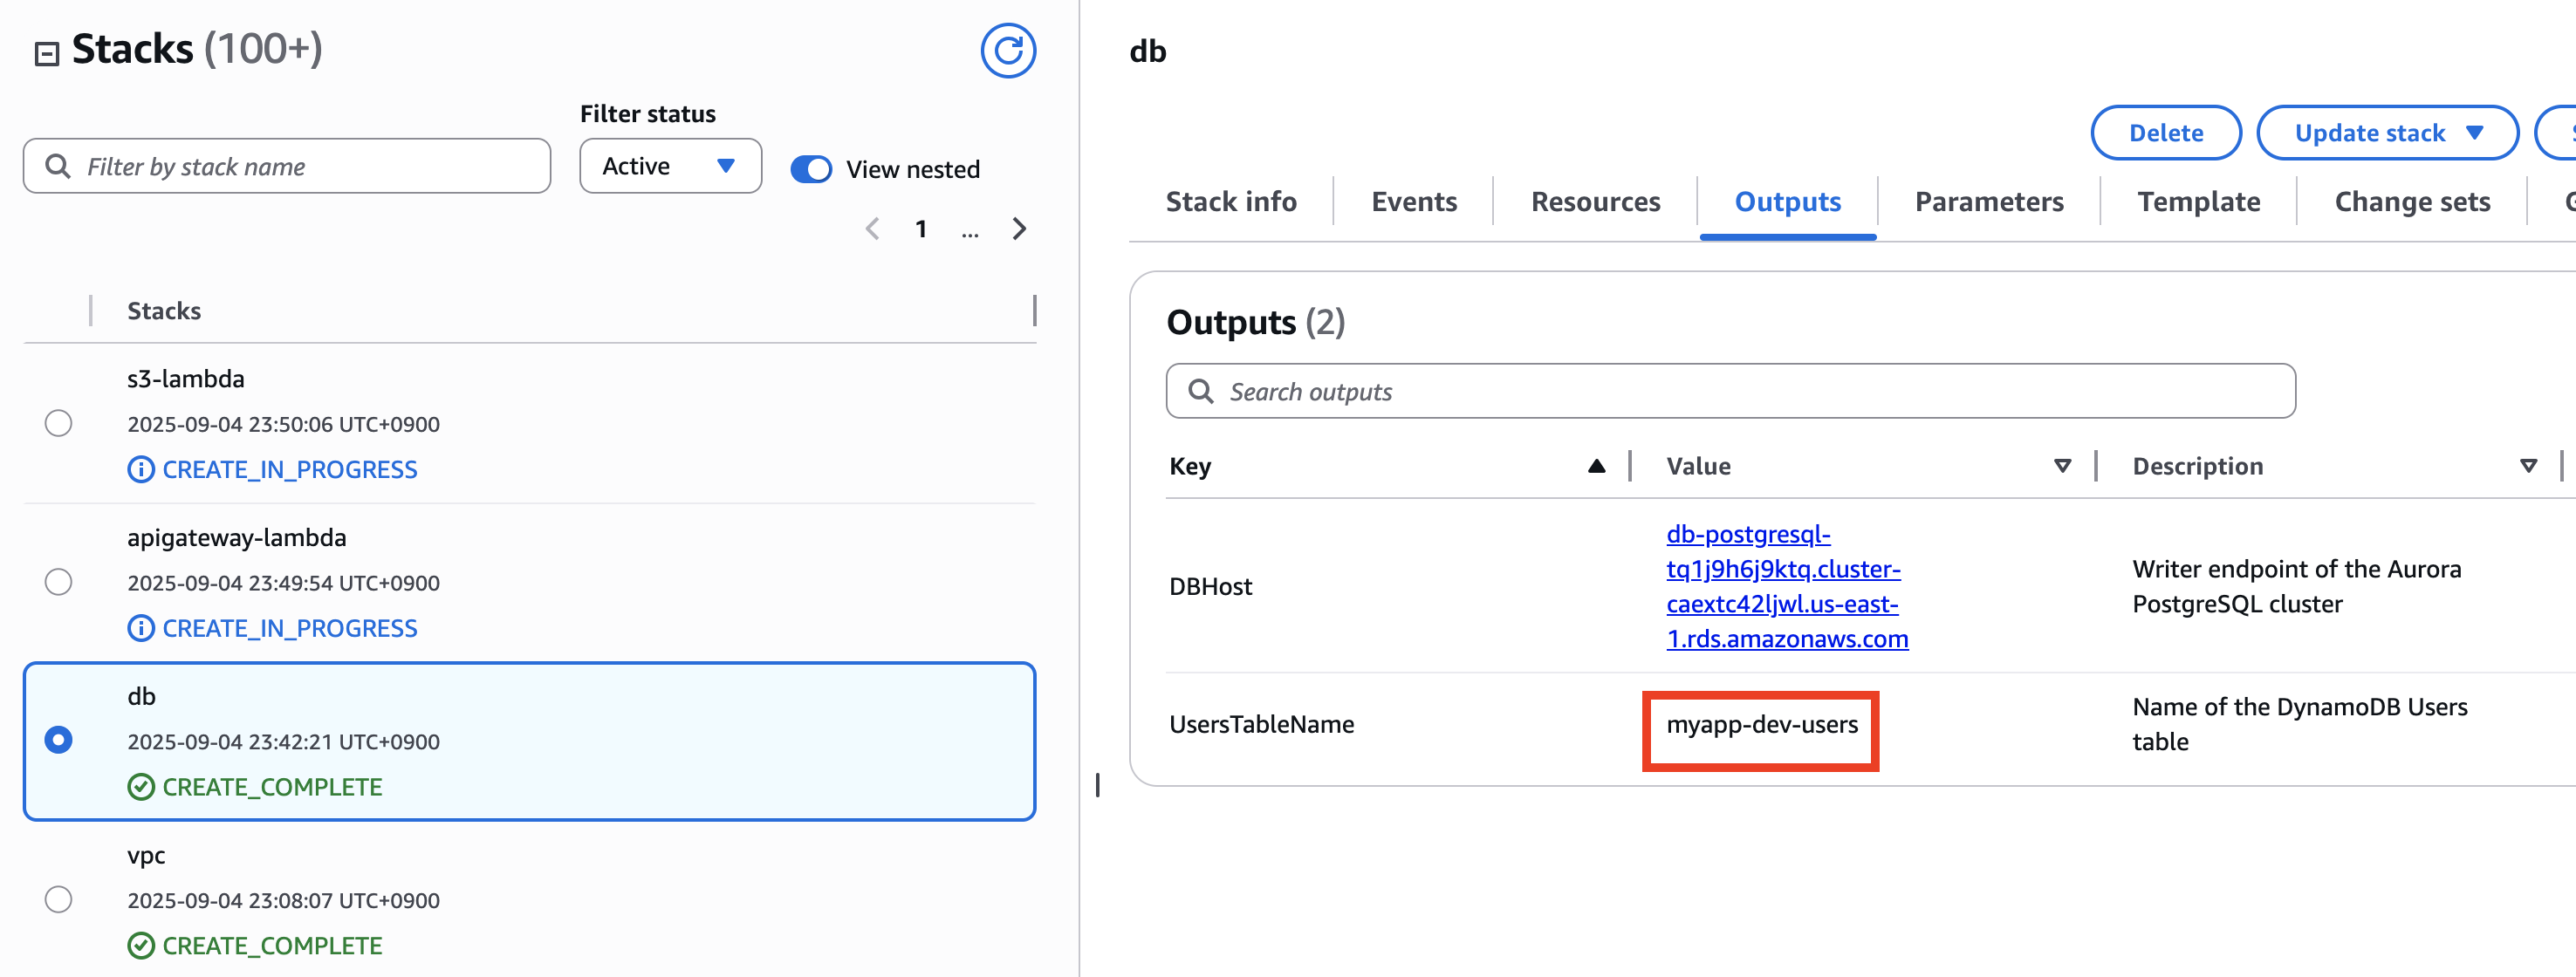
DynamoDB Setup
Inserting Test Data
This catalog also provisions an Amazon DynamoDB table. You can verify the table details in the Outputs section of the CloudFormation stack used to deploy the database.
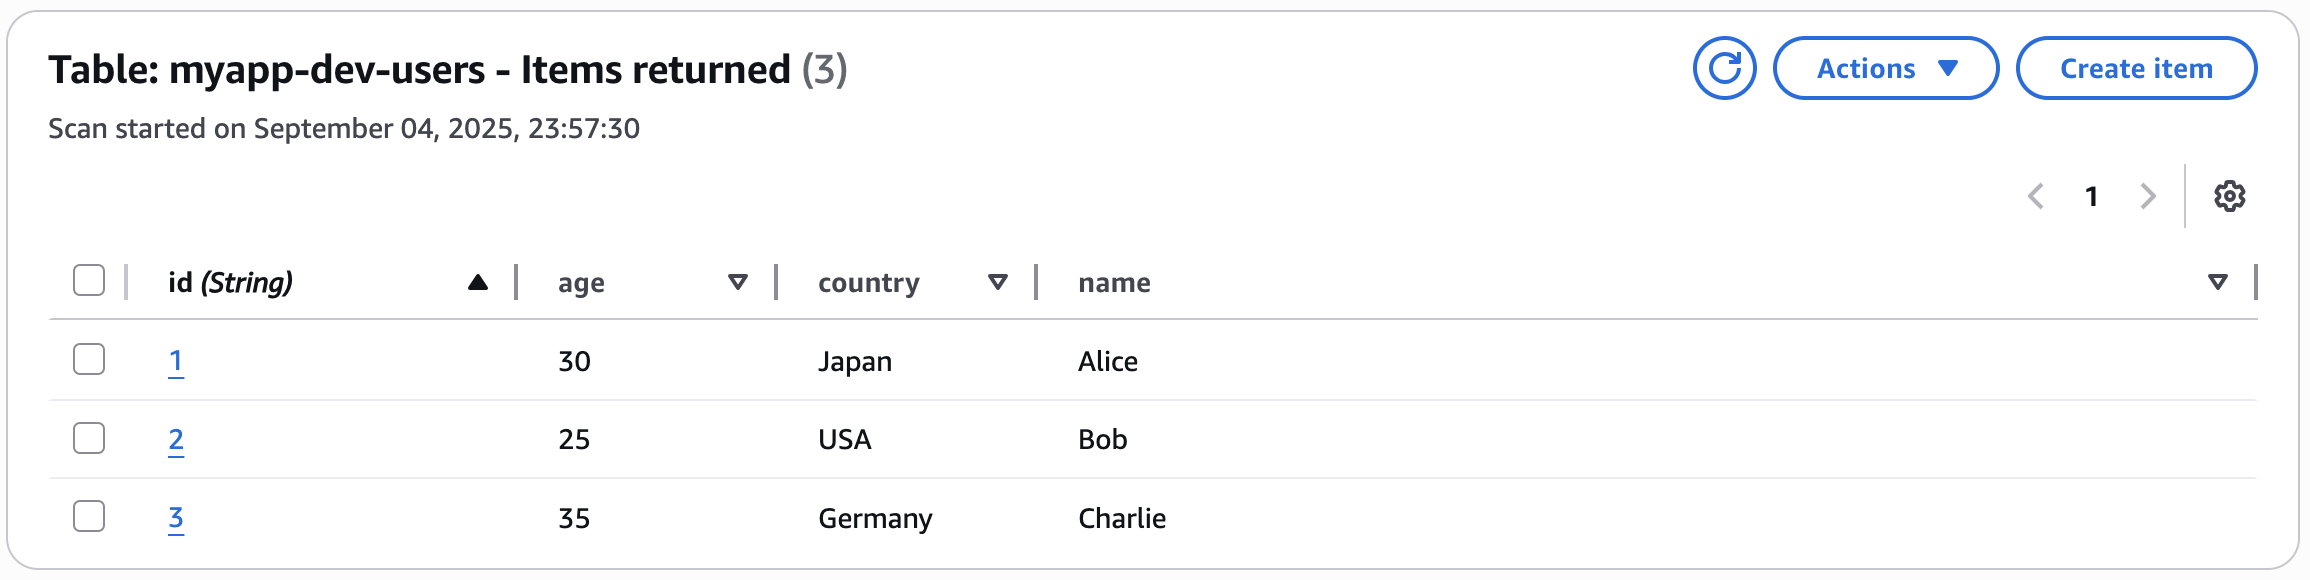
You can insert the same test data into this table using the following AWS CLI commands.
[ec2-user ~]aws dynamodb put-item \
  --region us-east-1 \
  --table-name myapp-dev-users \
  --item '{
    "id": {"S": "1"},
    "name": {"S": "Alice"},
    "country": {"S": "Japan"},
    "age": {"N": "30"}
  }'

[ec2-user ~]aws dynamodb put-item \
  --region us-east-1 \
  --table-name myapp-dev-users \
  --item '{
    "id": {"S": "2"},
    "name": {"S": "Bob"},
    "country": {"S": "USA"},
    "age": {"N": "25"}
  }'

[ec2-user ~]aws dynamodb put-item \
  --region us-east-1 \
  --table-name myapp-dev-users \
  --item '{
    "id": {"S": "3"},
    "name": {"S": "Charlie"},
    "country": {"S": "Germany"},
    "age": {"N": "35"}
  }'
When you check from the Management Console, you can confirm that the data has been inserted as shown below.
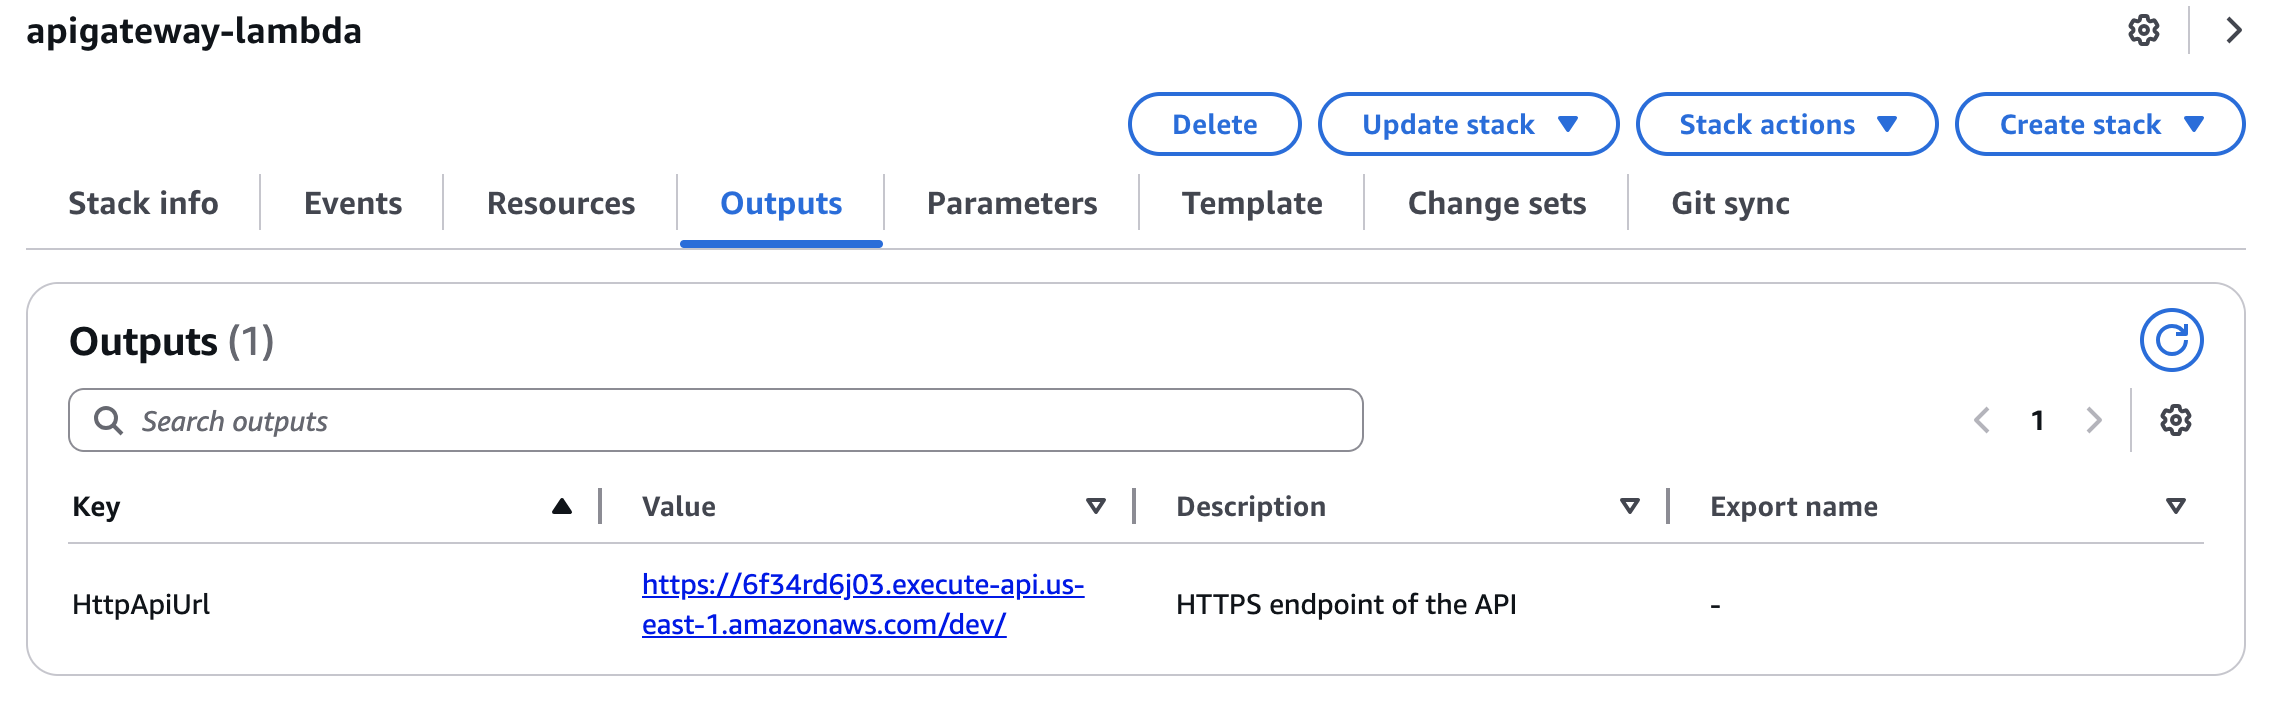
Operation Verification for API Gateway + Lambda Application
Let's check the API endpoint in CloudFormation's Output tab.
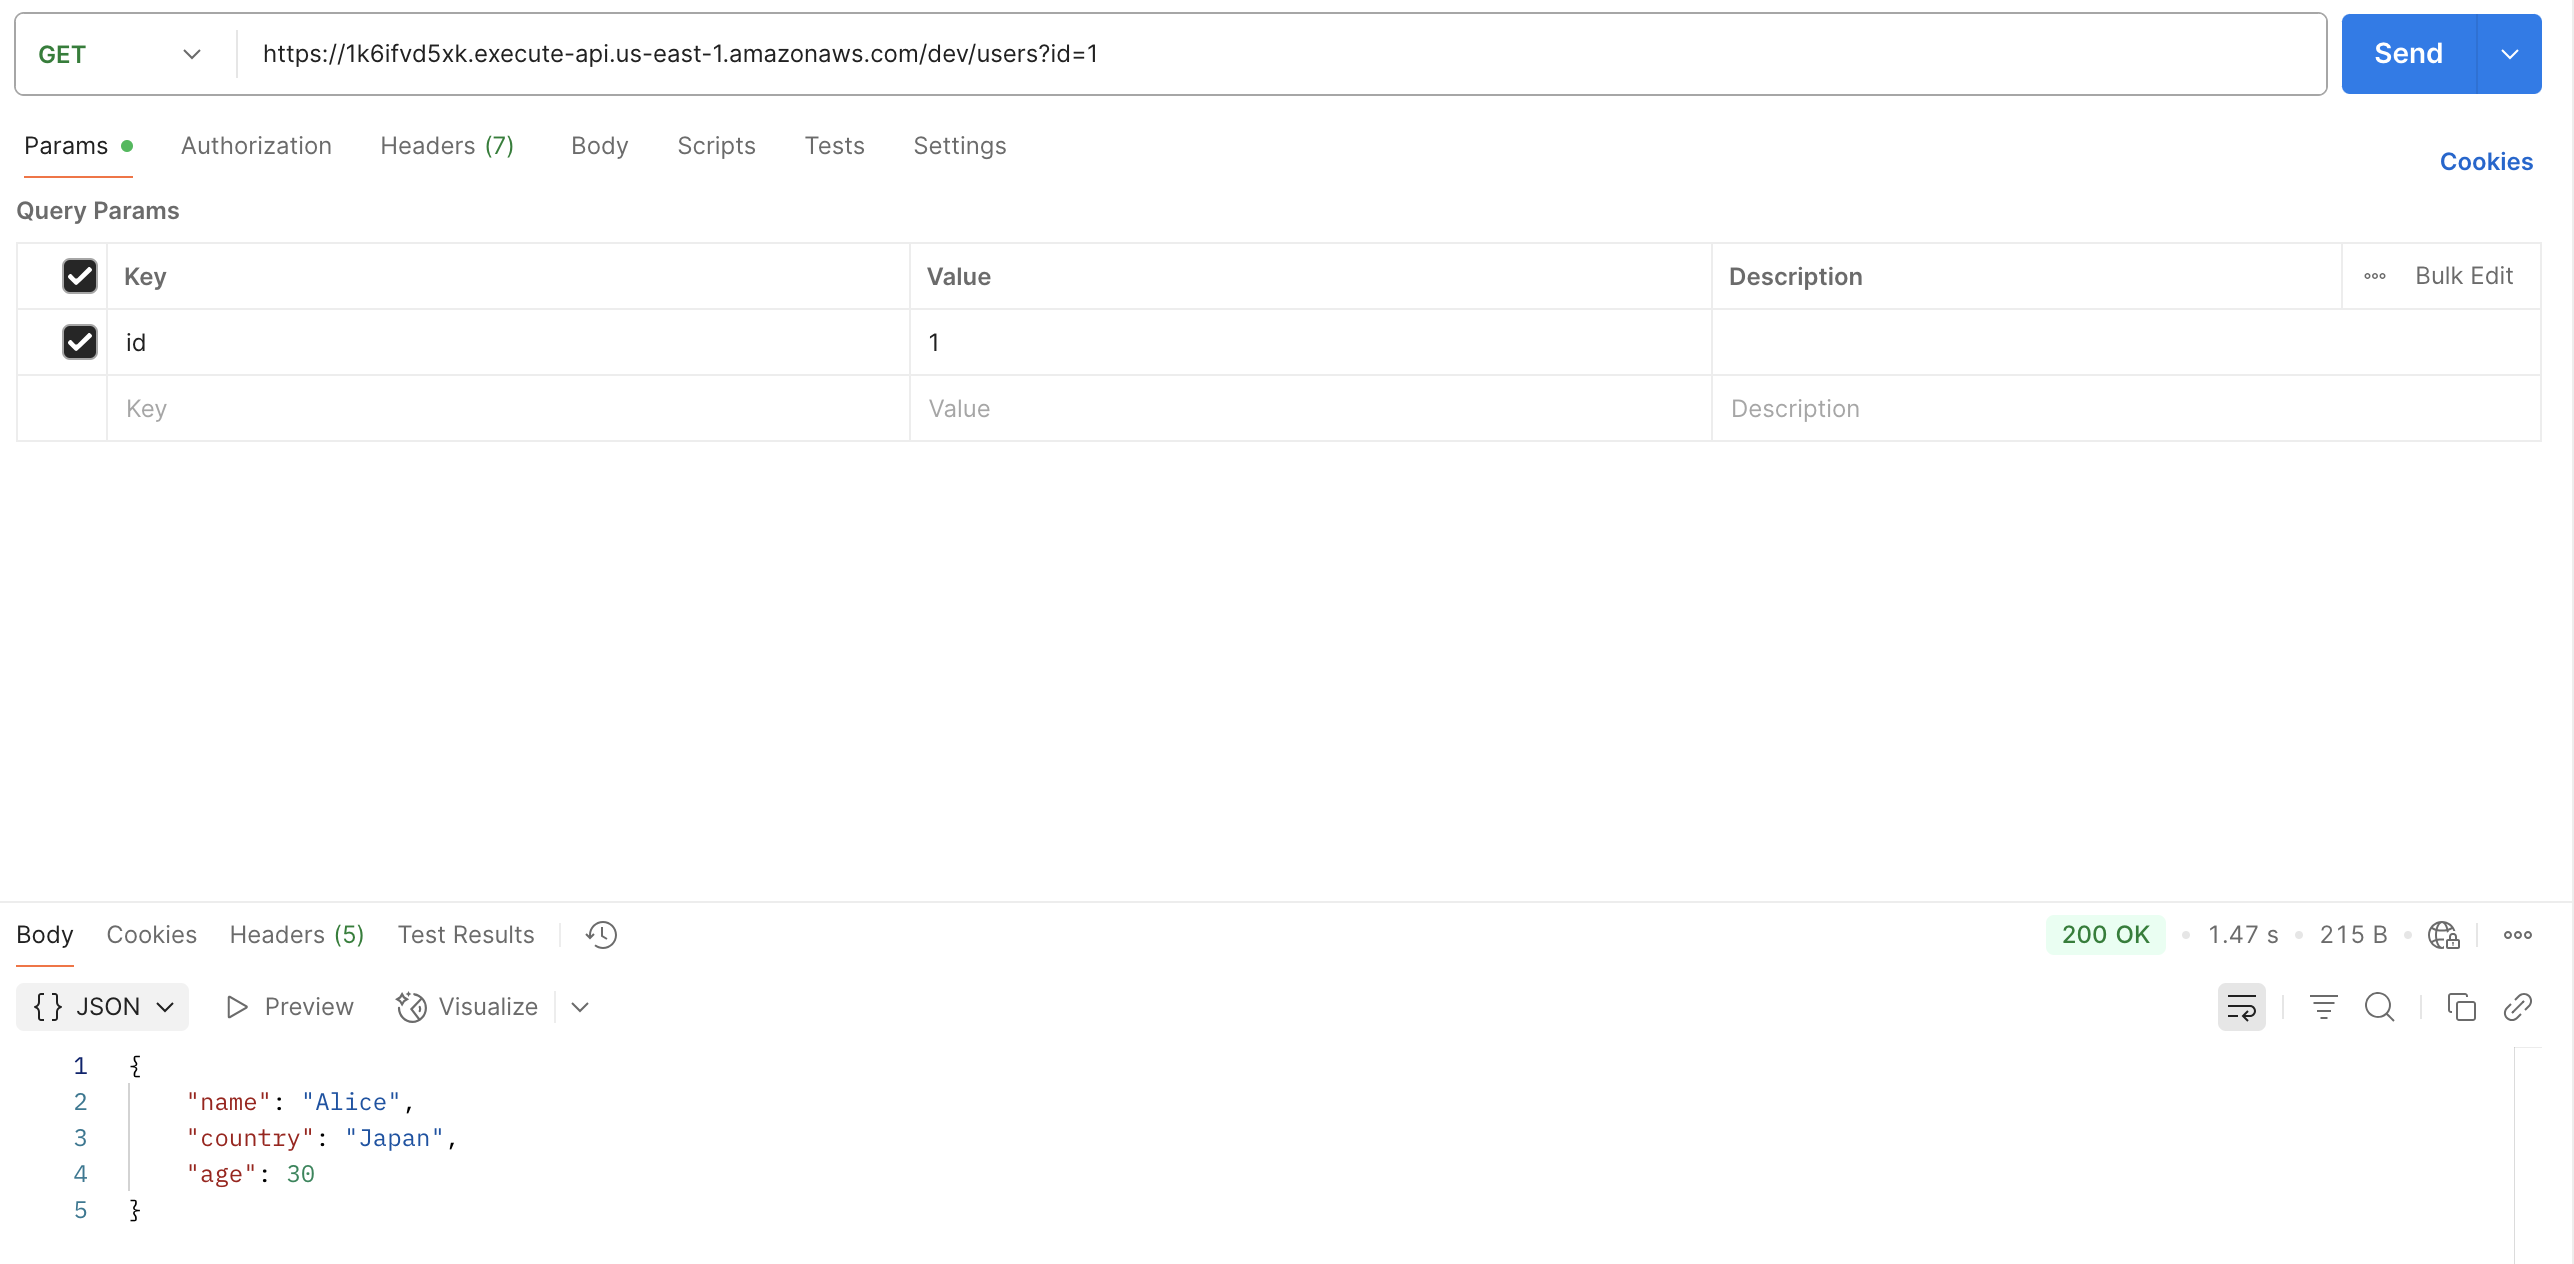
Execute a request using Postman or similar tools to the endpoint that retrieves user data with GET method like https://<your API ID>.execute-api.us-east-1.amazonaws.com/dev/users?id=1. You can see that the data for the user with id=1 registered in the database can be retrieved as shown below. (Note that using auto-incremented IDs as user IDs should be avoided in actual applications for security reasons, as it makes IDs easily guessable by attackers. It is recommended to generate UUIDs or similar on the application side.)
Next, let's try registering user data through the API. Send a request to https://<your API ID>.execute-api.us-east-1.amazonaws.com/dev/users using POST method with the following Body parameters.
{
  "name": "horike",
  "country": "Japan",
  "age": "41"
}
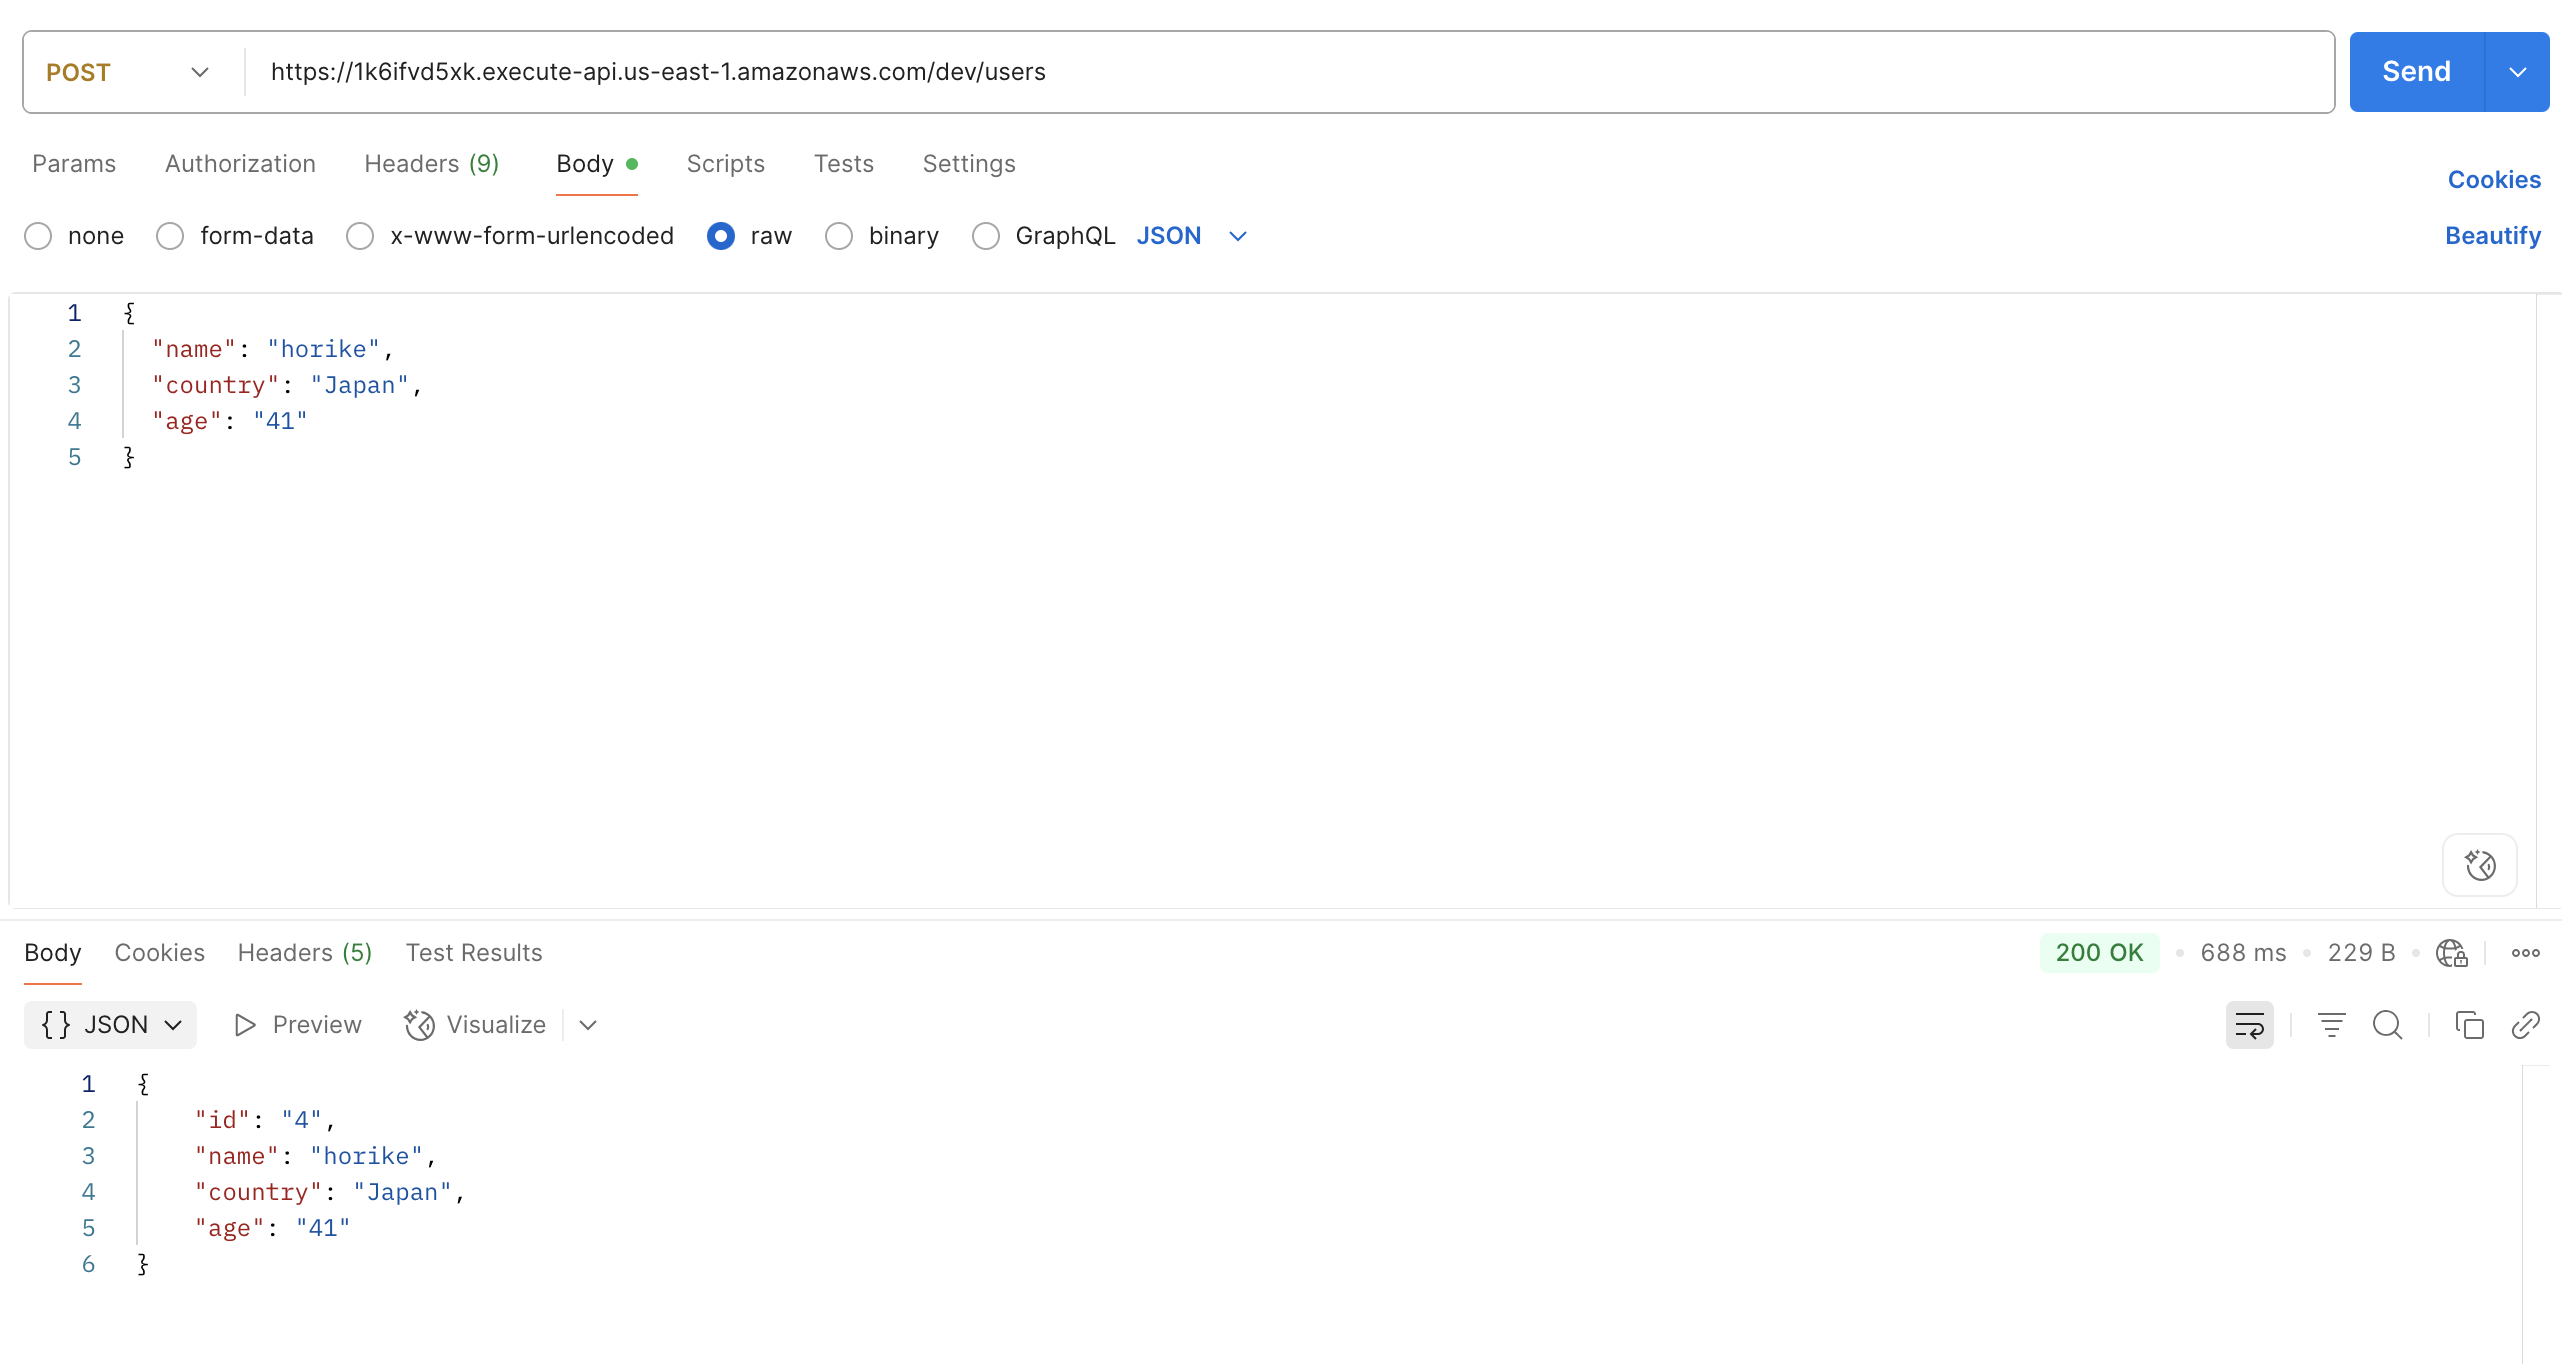
You can confirm that the data has been created correctly by checking with a SELECT statement from pgAdmin.
Operation Verification for S3 + Lambda Application
Let's check the bucket for uploading CSV files in CloudFormation's Output.
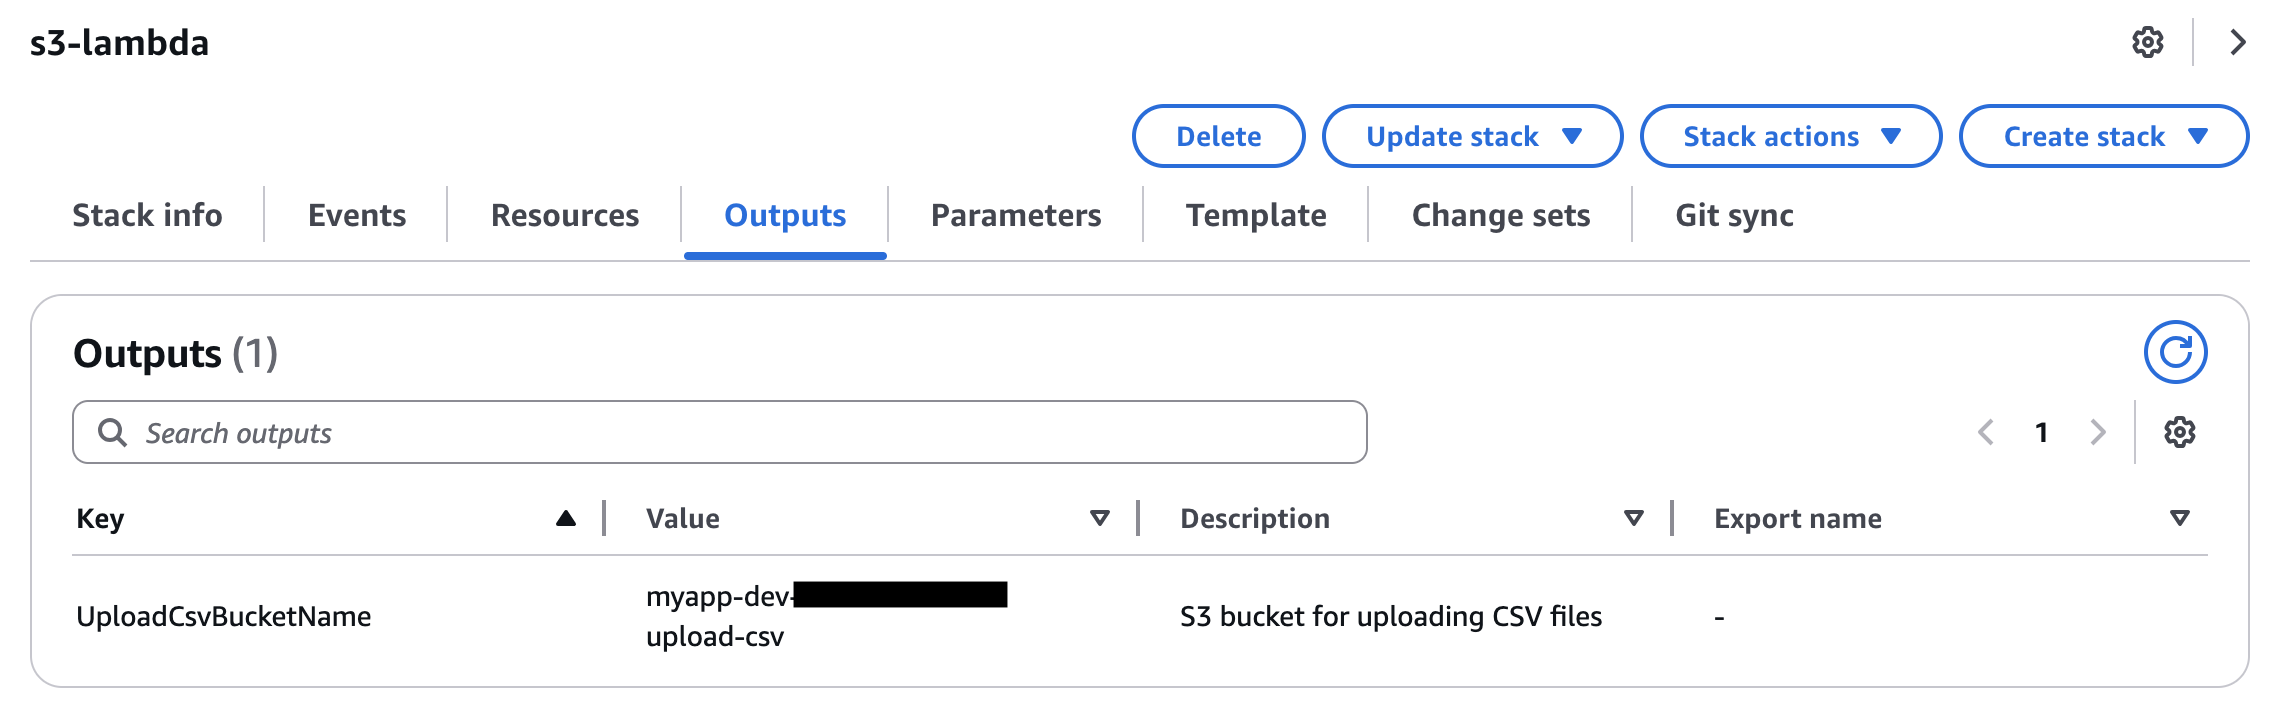
Upload test CSV with the following command, and you can confirm that the CSV data is correctly stored in the database when checked with pgAdmin.
[ec2-user ~]aws s3 cp ./src/sample_users.csv s3://myapp-dev-<Account ID>-upload-csv